
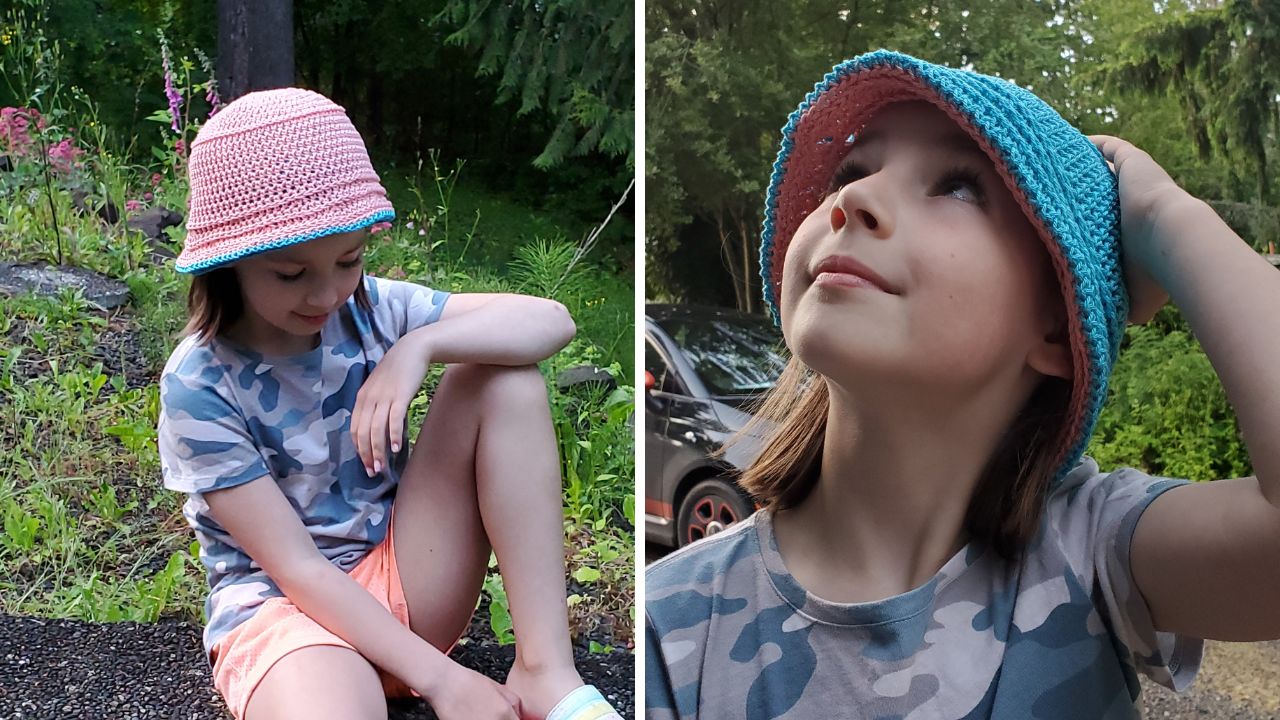
Looking for a crochet bucket hat that gives you two completely different looks? This free reversible crochet bucket hat pattern creates two hats in one. Simply turn it inside out whenever you want to switch colors or change your outfit.
Unlike crochet bucket hats with wide, floppy, or ruffled brims, this pattern has a straight brim that gives it a classic bucket-hat shape. The double-layer construction also helps the hat hold its shape and makes it warmer and sturdier than a typical single-layer crochet hat.
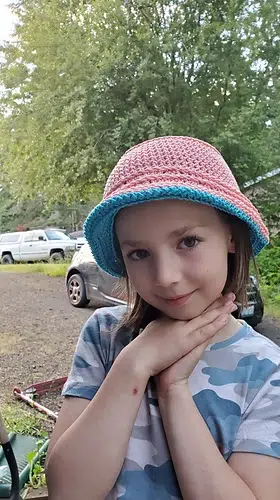
To create the reversible design, you’ll crochet two hats in contrasting colors, place one inside the other, and join them together around the brim. Once they’re connected, either color can be worn on the outside.
This intermediate crochet pattern includes both child and adult sizes and uses worsted-weight yarn and a 4.5 mm crochet hook. The hat is worked in continuous rounds using half double crochet and third-loop stitches.
Choose two coordinating colors for a subtle reversible design, or use contrasting shades to create two completely different looks. Either way, this reversible crochet bucket hat is a fun and practical project you can wear throughout more than one season.
- Get the ad-free, large print, printable PDF pattern HERE. Scroll down for the free version.
- Add this pattern to your Ravelry queue HERE.
Why You’ll Love This Reversible Crochet Bucket Hat
If you love crochet projects that are both practical and stylish, this reversible bucket hat is a fun addition to your handmade wardrobe. Instead of making two separate hats, you’ll get two different looks in a single project.
- Two hats in one. Simply flip the hat inside out to wear either color on the outside.
- Classic bucket hat shape. The straight brim gives it a timeless look that pairs well with casual outfits.
- Great for using two favorite colors. Mix coordinating shades for a subtle look or choose bold contrasts for something eye-catching.
- Available in multiple sizes. The pattern includes both child and adult sizes, making it easy to crochet hats for the whole family.
- Perfect for everyday wear. The double-layer construction helps the hat keep its shape while providing extra warmth for cooler days.
- Includes a step-by-step video tutorial. Follow along with the written instructions or watch the video if you’re a visual learner.
| Skill Level | Intermediate |
|---|---|
| Yarn Weight | Worsted (#4) |
| Hook Size | 4.5 mm |
| Construction | Two hats joined together |
| Sizes | Child & Adult |
| Reversible | Yes |
| Video Tutorial | No |
Materials & Supplies
Here’s everything you’ll need to make your reversible crochet bucket hat.
Yarn
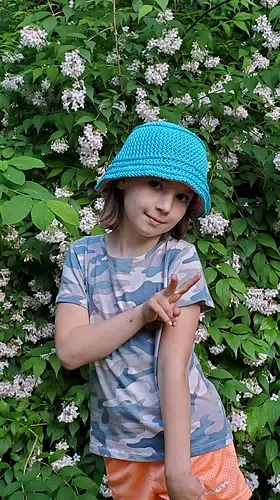
This pattern uses Cascade Yarns Noble Cotton in the colors Blue Turquoise and Soft Peach worsted weight (#4) yarn in two contrasting colors. Since the hat is completely reversible, choosing colors that complement each other will give you two unique looks in one project.
If you’re making a summer hat, cotton yarn is an excellent choice because it’s breathable and helps the hat hold its shape. Acrylic yarn also works well if you’re looking for a softer, warmer hat to wear during cooler weather.
Crochet Hook
- 4.5 mm crochet hook
Other Supplies
- Stitch marker
- Yarn needle
- Scissors
- Measuring tape (optional, but helpful for checking fit)
Finished Sizes
This pattern includes instructions for both:
- Child: 6.5” crown (16.5 cm)
4.5″ height (11.5 cm)
- Adult: 7.5” crown (19 cm)
5.5” height (14 cm)
Be sure to check your gauge before starting to ensure the finished hat fits as intended.
Abbreviations
US Terminology
- ch = chain
- st = stitch
- sl st = slip stitch
- sc = single crochet
- hdc = half double crochet
Special Stitches
Hdc in the 3rd loop free tutorial from Raffamussa Designs
Crab Stitch free tutorial from Good Knit Kisses
Gauge
The first three rounds of the free crochet bucket hat pattern should be approximately 2.25” (5.5 cm) in diameter.
Notes
- Pattern is worked in continuous rounds. You will not join with a slip stitch at the end of each round. You will just keep going. A stitch marker is used to keep track of your rounds.
- The increases in the crown section are staggered to make it more circular. If all of the increases are stacked in the same spot, then it starts to turn into a polygon with 9 sides.
Free Crochet Bucket Hat Pattern
Child Size – Crown of Hat
Start with a Magic Circle
Round 1: Ch 1, hdc 9 in the loop. Pull on your starting tail to close the magic circle. (9)
Round 2: hdc 2 in each st around (18)
Round 3: *hdc 2 in the next st, hdc in the next st* repeat the starred section around (27)
Check your gauge here. Your circle should be approximately 2.25” (5.5 cm) in diameter. If it is bigger than that, try using a 4 mm hook. If it is smaller than that, try using a 5 mm hook.
Round 4: hdc in the next st, *hdc 2 in the next st, hdc in the next 2 sts* repeat the starred section for a total of 8 times, hdc 2 in the next st, hdc in the last st (36)
Round 5: *hdc 2 in the next st, hdc in the next 3 sts* repeat the starred section around (45)
Round 6: hdc in the next 2 sts, *hdc 2 in the next st, hdc in the next 4 sts* repeat the starred section for a total of 8 times, hdc 2 in the next st, hdc in the last 2 sts (54)
Round 7: *hdc 2 in the next st, hdc in the next 5 sts* repeat the starred section around (63)
Round 8: hdc in the next 3 sts, *hdc 2 in the next st, hdc in the next 6 sts* repeat the starred section for a total of 8 times, hdc 2 in the next st, hdc in the last 3 sts (72)
Round 9: hdc in each st around (72)
Child Size – Body of Hat
Set-Up: Sl st in the next st, remove your hook from the loop, insert your hook in the next st from back to front, grab the loop again and pull it through to the back.
Round 10: work in the 3rd loops for this round, Ch 1, sc in the first st, hdc in the rest of the stitches around (72)
Rounds 11-18: hdc in each st around (72)
Child Size – Brim of Hat
Set-Up: Sl st in the next st, remove your hook from the loop, insert your hook in the next st from back to front, grab the loop again and pull it through to the back.
Round 19: work in the 3rd loops for this round, ch 1, sc in the first st, hdc in the next 6 sts, hdc 2 in the next st, *hdc in the next 7 sts, hdc 2 in the next st* repeat the starred section for a total of 8 times (81)
Round 20: hdc in each st around (81)
Set-Up: Sl st in the next st, remove your hook from the loop, insert your hook in the next st from back to front, grab the loop again and pull it through to the back.
Round 21: work in the 3rd loops for this round, ch 1, sc in the first st, hdc in the next 3 sts, *hdc 2 in the next st, hdc in the next 8 sts* repeat the starred section for a total of 8 times, hdc 2 in the next st, hdc in the last 4 sts (90)
Round 22: hdc in each st around (90)
Set-Up: Sl st in the next st, remove your hook from the loop, insert your hook in the next st from back to front, grab the loop again and pull it through to the back.
Round 23: work in the 3rd loops for this round, ch 1, hdc in each st around, sl st to join to the first st. (90)
Fasten off. Repeat instructions with a second color of yarn, so now you have two hats. Nestle them inside each other and work the edging through the last round of both hats at the same time using the color of your choice.
Edging Option 1: crab st around
Edging Option 2: *sl st, ch 1* repeat the starred section around
Adult Size – Crown of Hat
Start with a Magic Circle (Check out this article from Littlejohn’s Yarn if you’re unfamiliar)
Round 1: Ch 1, hdc 9 in the loop. Pull on your starting tail to close the magic circle. (9)
Round 2: hdc 2 in each st around (18)
Round 3: *hdc 2 in the next st, hdc in the next st* repeat the starred section around (27)
Check your gauge here. Your circle should be approximately 2.25” (5.5 cm) in diameter. If it is bigger than that, try using a 4 mm hook. If it is smaller than that, try using a 5 mm hook.
Round 4: hdc in the next st, *hdc 2 in the next st, hdc in the next 2 sts* repeat the starred section for a total of 8 times, hdc 2 in the next st, hdc in the last st (36)
Round 5: *hdc 2 in the next st, hdc in the next 3 sts* repeat the starred section around (45)
Round 6: hdc in the next 2 sts, *hdc 2 in the next st, hdc in the next 4 sts* repeat the starred section for a total of 8 times, hdc 2 in the next st, hdc in the last 2 sts (54)
Round 7: *hdc 2 in the next st, hdc in the next 5 sts* repeat the starred section around (63)
Round 8: hdc in the next 3 sts, *hdc 2 in the next st, hdc in the next 6 sts* repeat the starred section for a total of 8 times, hdc 2 in the next st, hdc in the last 3 sts (72)
Round 9: *hdc 2 in the next st, hdc in the next 7 sts* repeat the starred section around (81)
Round 10: hdc in the next 4 sts, *hdc 2 in the next st, hdc in the next 8 sts* repeat the starred section for a total of 8 times, hdc 2 in the next st, hdc in the last 4 sts (90)
Round 11: hdc in each st around (90)
Adult Size – Body of Hat
Set-Up: Sl st in the next st, remove your hook from the loop, insert your hook in the next st from back to front, grab the loop again and pull it through to the back.
Round 12: Ch 1, sc in the 3rd loop of the first st, hdc in the 3rd loop of the rest of the stitches around (90)
Rounds 13-22: hdc in each st around (90)
Adult Size – Brim of Hat
Set-Up: Sl st in the next st, remove your hook from the loop, insert your hook in the next st from back to front, grab the loop again and pull it through to the back.
Round 23: work in the 3rd loops for this round, sc in the first st, hdc in the next 8 sts, hdc 2 in the next st, *hdc in the next 9 sts, hdc 2 in the next st* repeat the starred section for a total of 8 times (99)
Round 24: hdc in each st around (99)
Set-Up: Sl st in the next st, remove your hook from the loop, insert your hook in the next st from back to front, grab the loop again and pull it through to the back.
Round 25: work in the 3rd loops for this round, sc in the first st, hdc in the next 4 sts, *hdc 2 in the next st, hdc in the next 10 sts* repeat the starred section for a total of 8 times, hdc 2 in the next st, hdc in the last 5 sts (108)
Round 26: hdc in each st around (108)
Set-Up: Sl st in the next st, remove your hook from the loop, insert your hook in the next st from back to front, grab the loop again and pull it through to the back.
Round 27: work in the 3rd loops for this round, hdc in each st around, sl st to join to the first st. (108)
Fasten off. Repeat instructions with a second color of yarn, so now you have two hats. Nestle them inside each other and work the edging through the last round of both hats at the same time using the color of your choice.
Edging Option 1: crab st around
Edging Option 2: *sl st, ch 1* repeat the starred section around
Frequently Asked Questions
Is this reversible crochet bucket hat pattern beginner-friendly?
This pattern is rated intermediate because it is worked in continuous rounds and uses techniques like working in the third loop of the half double crochet stitch. If you’re comfortable crocheting in the round and reading patterns, you’ll be able to complete this project with confidence.
What yarn is best for a crochet bucket hat?
You can make this bucket hat with either cotton or acrylic worsted-weight yarn. Cotton yarn is lightweight, breathable, and helps the hat keep its shape, making it a great choice for warm weather. Acrylic yarn creates a softer, warmer hat that’s perfect for cooler seasons.
Can I make this crochet bucket hat in one color?
Yes! Although this pattern is designed to be reversible with two contrasting colors, you can use the same color for both layers if you prefer a solid-colored hat.
Why is my crochet bucket hat floppy?
If your hat feels too floppy, your stitches may be looser than the pattern gauge or your yarn may be softer than the sample. Checking your gauge before you begin and choosing a yarn with good structure, such as cotton, can help the hat hold its shape better.
How do I make my crochet bucket hat larger or smaller?
The pattern includes instructions for both child and adult sizes. If you need additional sizing, you can adjust the crown by increasing or decreasing until you reach the desired head circumference before working the sides of the hat.
Can I sell bucket hats made from this pattern?
Yes. You’re welcome to sell finished hats you make using this pattern. However, the written pattern, photos, and video tutorial are protected by copyright and may not be copied, redistributed, or resold.
How do I wash a crochet bucket hat?
Hand washing is the safest option for most crochet hats. Gently wash the hat in cool water with a mild detergent, reshape it while it’s damp, and lay it flat to dry. Always follow the care instructions for the specific yarn you use.
Is there a video tutorial for this pattern?
Yes! If you prefer visual instruction, you can follow along with the step-by-step video tutorial included in this post. It walks you through each stage of the project to help you crochet your reversible bucket hat with confidence.
____________________
Ready for your next crochet project?
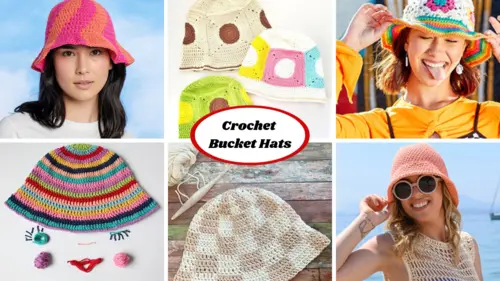
Check out these other free crochet summer hat patterns that you might like:
© 2025 Littlejohn’s Yarn. All rights reserved.
Originally designed by Nine Inspired, this pattern has found a new home with Littlejohn’s Yarn and is shared here with permission.