

Why You Need to Learn the Magic Ring
If you have been crocheting for a while now, then you are probably wondering how to make your crochet projects look better (you know, like the amazing crochet projects you see on social media!).
One way to improve your crochet skills and to improve the look of your finished crochet projects is by using and learning the Magic Ring! This one simple trick will eliminate awkward gaps and holes in your projects that are worked in the round.
It is an especially helpful trick to have up your sleeve for amigurumi projects, for beanies and mittens, and for projects that incorporate granny squares!
What’s Wrong with How You Normally Start Working in the Round?
You know how some projects have you start out by chaining 3 or 4 stitches and then joining to form a little ring? This is a common way of starting out working in the round that is easy enough for beginner crocheters.
The problem with this method is that it leaves a hole in the middle of your project! If you are making a beanie, then you might be able to disguise this hole with a pom pom.
But if you are making something like crochet amigurumi, then this becomes an even bigger problem, because stuffing may leak out of the hole!
What is a Magic Ring in Crochet Terms?
That’s where the Magic Ring comes in! It is a super clever way to start your crochet projects that are worked in the round because the Magic Ring eliminates the starting hole entirely.
So if you are wanting to start your next crochet project off on the right foot, then you really owe it to yourself to learn how to do this amazing crochet technique!
Can you Substitute the Magic Ring for Other Patterns?
Absolutely! If you’ve got a crochet pattern that’s telling you to start with the more traditional method of a chain 3 or 4 joined to form a circle, you can use the Magic Ring instead.
This is a great and easy way to breathe new life into an older crochet pattern, and to give your finished products a more polished finish!
What Are the Other Names for the Magic Ring?
One quick thing to note is that there are some other names floating around out there for the Magic Ring. You might see it referred to as the Magic Loop or the Magic Circle or the Adjustable Circle or the Adjustable Loop (those last two aren’t very catchy, are they?).
These terms are used interchangeably, and they all mean the same thing! You will also notice that each of these terms has its own abbreviations.
You will commonly see the Magic Ring abbreviated as:
- Magic Ring – MR
- Magic Loop – ML
- Magic Circle – MC
Magic Ring Video Tutorial
How To Do the Magic Ring in Crochet
Ok, so how do you actually do the Magic Ring? Let’s break it down into 5 easy steps! Fair warning, it might seem tricky at first, but keep at it and eventually, it will click! (And once it does click, you will wonder how you ever survived without it!) Oh, and if you are left-handed, scroll down to reference the next section.
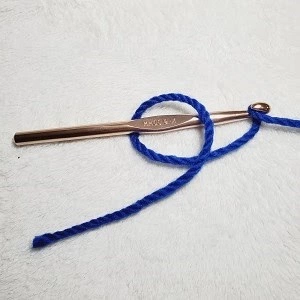
Step 1.
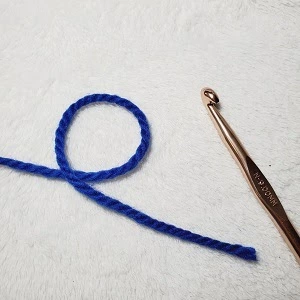
Make a loop with your yarn (kind of like how you start a slip knot)
Step 2.
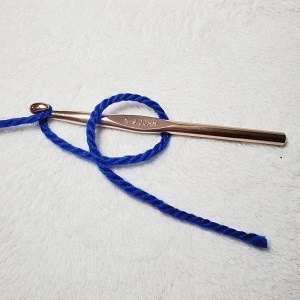
Insert your hook into the loop and grab onto your working yarn.
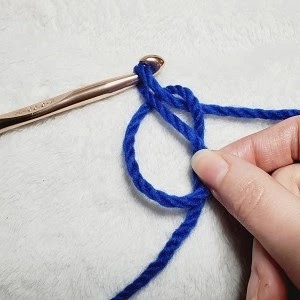
Step 3.
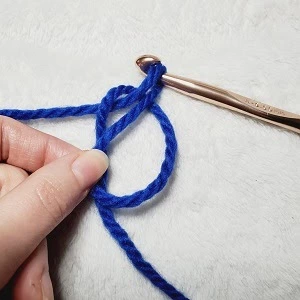
Pull the yarn through the loop. Pinch the loop and the yarn tail together with your fingers. (You’ll see why this matters in a minute)
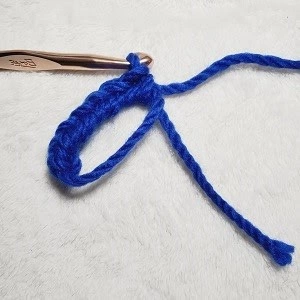
Step 4.
Now you can start working into the loop! Here I chained one and then did 6 single crochet stitches into the loop. You will be working your stitches around both the loop and the starting tail (which is why I like to pinch them together!)
How To Make a Magic Ring Left Handed:
Step 1.

Make a loop with your yarn (kind of like how you start a slip knot)
Step 2.
Insert your hook into the loop and grab onto your working yarn.
Step 3.
Pull the yarn through the loop. Pinch the loop and the yarn tail together with your fingers. (You’ll see why this matters in a minute)
Step 4.
Now you can start working into the loop! Here I chained one and then did 6 single crochet stitches into the loop. (You’ll just follow the pattern directions for this part). Make sure that you are working your stitches around both the loop and the starting tail (which is why I like to pinch them together!)
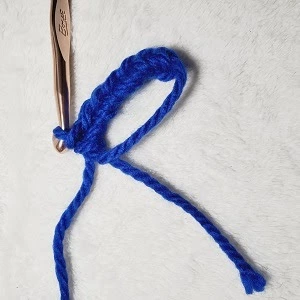
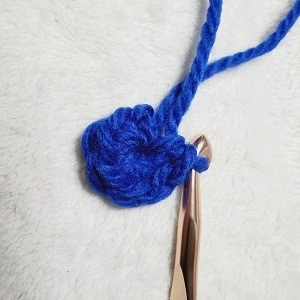
How to Close a Magic Ring in Crochet
When you have worked all of your stitches for round 1 into your Magic Ring, then you are ready to close it! All you have to do is pull on the starting tail of yarn until the hole in the middle of your stitches is closed. Then your last stitch should be snuggled up nice and close to your first stitch, so you can easily join to finish the round (or just continue if you are working in a spiral).
Other Methods of Crocheting the Magic Ring
There are a couple of other methods that people have figured out when it comes to crocheting the Magic Ring. If my instructions didn’t “click” for you, don’t sweat it! Check out these tutorials for alternative methods of crocheting the Magic Ring that may make more sense for you.
- This method from Sarah Maker involves wrapping the yarn around the fingers. Check it out here!
- This method from Wilmade combines wrapping the yarn around the fingers with the “pinching” method that I like to use. Check it out here!
- This method from Ambassador Crochet starts by making a backwards letter “J”. Check it out here!
Magic Ring Crochet Patterns to Practice With:
The best way to learn more about the magic ring is to experience it yourself! Lucky for you, there are a bunch of crochet patterns out there that call for the magic ring. It is certainly a very popular crochet technique! You can even check out some free crochet patterns that use the magic ring right here on my blog!
Bucket Hat

Throw it back with a stylish bucket hat! These cute caps have been making a big comeback lately, and you will love how easy they are to make! This is one style of hat that can’t be saved with a Pom Pom, so thank goodness for the Magic Ring technique.
KISS Mittens
You can whip up a pair of these bulky mittens in no time flat! You will definitely want to start with the Magic Ring, so there’s no gap at the tip of your mittens. Otherwise, your fingers might get frosty!
Goldie Slippers

Nobody likes cold toes, so starting off a pair of slippers with the Magic Ring technique is an absolute MUST. This is a great project to practice with because it works up superfast in super bulky weight yarn.
Happy Crocheting!
Psst… If you love free crochet patterns (I know…duh) make sure to follow my blog on Facebook, Instagram, or Pinterest! Littlejohn’s Yarn posts original designs and free crochet pattern round-ups regularly for you to enjoy.