

Free crochet beanie pattern
Let your first project of the season be this free crochet beanie pattern! The days are getting shorter & cooler, so it’s time to break out your yarn you stored away all summer.
To create the leaves, we will be using the spike stitch. We will be creating chain spaces over 3 rows to create this look. Within these rows, you will be creating these spike stitches.
Don’t worry. I will take you step by step in creating this hat pattern. Written and video tutorial included. Scroll down the page for the complete pattern.
More hat patterns you may like:
- Twisted Messy Bun Hat
- Easy Crochet Beanie
- Vintage Inspired Juliet Cap
- Puff Stitch Beanie
- Funky Crochet Hat
- Sunflower Mesh hat
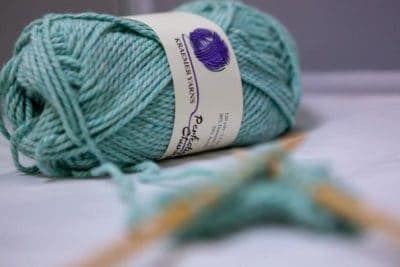
Gather your supplies

Want Your Work Featured?
Below are pictures of completed projects from some of my amazing followers. These artists are so talented that they turn my simple patterns into a work of art. Thank you for letting me share your beautiful work.
If you would like to have your work shared on my site, tag me on Instagram HERE or join my Facebook group

Video crochet beanie pattern (written pattern below)
- Get the ad-free, large print, printable PDF pattern HERE.
- Grab the Ultimate Pattern Bundle that includes 28 of my patterns just like this one for under $20 HERE.
- PIN this pattern to your Pinterest boards for later HERE.
- Add this pattern to your Ravelry queue HERE.


Free Written Pattern
Stitches
sc – single crochet
ch – chain
sl st – slip stitch
dc – double crochet
fpdc – front post double crochet
Specialty stitches
Leaf stitch – (Yarn over, insert hook into first ch-1 sp) 3x. Working into ch-sp below current row, (yarn insert, hook into ch-r sp) 3x. Move over a stitch, working into the 3rd row down, (yarn over, insert hook into ch-1 sp) 3x. Move over a stitch, working in the 2nd row down ch-1sp, (yarn over, insert hook into ch-1 sp) 3x. Working in the row above current st, (yarn over, insert hook into ch-1 sp) 3x. Yarn over, pull all of loops on the hook. Ch 1 to finish off leaf stitch
Gauge please check before you start to attain the correct size
6 rows = 3 inches
Note: ch 3 at beginning of each round counts as DC st
Special Stitch: Leaf stitch (video 18:30)
Start (color a): Magic Circle,
Round 1: h 3 (counts as a dc), dc 10 into Magic Ring, sl st to join. (11)
Round 2: Ch3, 2 dc in each st around, sl st to join. (22)
Round 3: Ch 3, 2 dc next st, *dc, 2 dc* rep *to* each st around, sl st to join. (33)
Round 4: Ch 3, dc next st, 2 dc, *dc next 2 sts, 2 dc*, rep *to* around, sl st to join. (44)
Round 5: Ch 3, dc next 2 sts, 2 dc next, *dc next 3 sts, 2 dc*, rep *to* around, sl st to join. (55)
Round 6: Ch 3, dc next 3 sts, 2 dc, *dc next 4 sts, 2 dc* rep *to* around, sl st to join. (66)
Round 7 – 10: Ch 3, dc each st around, sl st to join. (66)
Round 11: Ch 3, dc 4, ch 1, sk 1, *dc next 7, ch 1, sk1* around, dc last 4, sl st to join
Round 12: Ch 3, dc next 2 sts, ch 1, sk 1, dc, ch 1, sk 1, dc, ch 1, sk 1. *Dc next 3 st, ch 1, sk 1, dc, ch1, sk1, dc, Ch1, sk1*, rep *to* around, dc in last 2 sts, sl st to join. (Video 10:15)
Round 13: Ch 4 (counts as dc+ch1), sk 1, dc, ch 1, sk 1, dc, ch 1, sk1, dc, ch 1, sk 1, dc. *Dc next 3 sts, ch 1,sk 1, dc, ch 1, sk 1, dc, ch 1, sk 1*, repeat from *to* around, dc in last 2 sts, sl st to join. (video 13:25)
Round 14 (color b): Ch3, dc next 2 sts, leaf stitch, *dc next 3 sts, ch2, leaf st, ch 2*, rep *to* around. Dc next 2 sts, sl st to join. (video 18:30 leaf stitch)
Round 15: Ch 1, sc in same space, sc each st around (note: 2 sc in the ch2 space, 1 in loop of leaf), sl st to join, (video 24:04)
Round 16: Ch 2 (does not count as a dc), dc in each st around, sl st to join,
Round 17-18: Ch 2, fpdc around, sl st to join
Finish: fasten off and weave in the end, add a puff/pom pom if desired
If you enjoyed this free crochet beanie pattern, then try out these other patterns: