
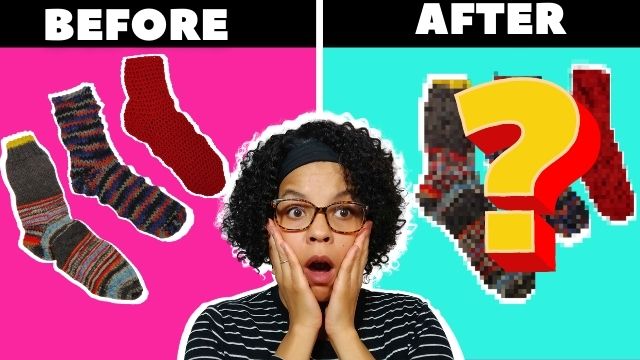
Have you followed a crochet project before that instructed you to block your work? If you’ve never blocked a crochet project before, then you might have just skipped over this step.
Some folks think that blocking is too time-consuming, too confusing, or just plain unnecessary. I know that I’m guilty of these things too!
Now that I’m in the know, I’m a proud member of “Team Block”. (Yeah, I just made that up) Once you learn what crochet blocking is and what an amazing improvement it can make on your completed projects, then you will be on “Team Block” too!
Crochet blocking can have many benefits! It can help projects that like to curl to stay flat instead. It can even out your tension and make your stitches appear more uniform.
It can open up lacework to make it really shine. Wonky granny squares can be fixed with a bit of blocking and crochet clothing can be pushed and pulled to the correct dimensions so that it fits like a glove.
With such a long list of benefits, you can see why you need to hop on board “Team Block” stat!
Which Projects Need to be Blocked?
You may decide to start blocking all your projects from now on, but you certainly don’t have to. Some crochet projects will benefit more from blocking than others.
Once you know more about the crochet blocking process, you can make more informed decisions about when to block and when to skip blocking.
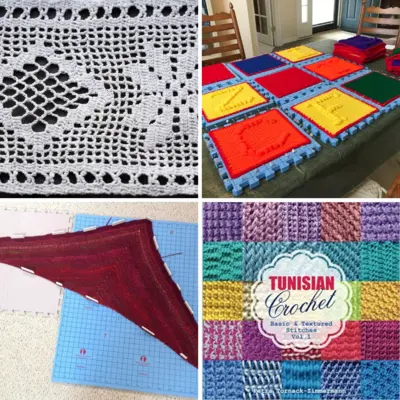
As a general rule of thumb, I like to block 4 types of crochet projects. The ones that involve lacework should really be blocked so that all your hard work looks exactly the way that you intended.
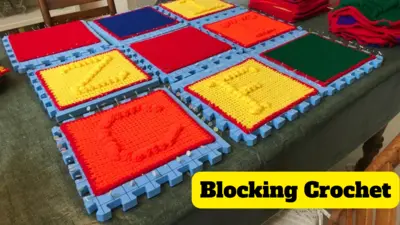
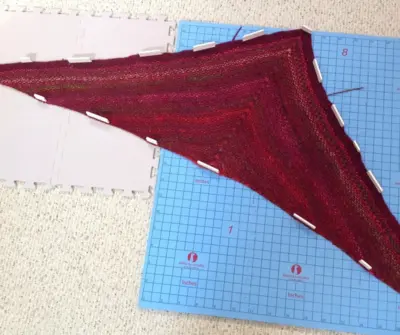
For projects involving multiple items sewn together, like a blanket made up of granny squares, I like to block all my squares to be the same size before I join them. In order to get the right fit, I also like to block all my crochet wearables and shawls.
Finally, I almost always block my Tunisian crochet projects to get them to stop curling.
When to Block?
The big question is, should you block your work before or after weaving in your ends? There are folks on both sides of the fence for this one that will swear up and down that their way is the right and only way.
Some folks feel that blocking before you weave in the ends is better, since the parts that have the ends woven into them won’t behave the same way as the rest of the work when you go to block it.
Some folks like to block after they weave in ends because it can help to lock those ends in and help them blend in better with the rest of the project.
There’s really no right or wrong way here. I encourage you to try both methods and see which you prefer. The end result won’t be vastly different either way, so don’t sweat it!
Equipment for Blocking
There’s a lot of fancy crochet blocking kits out there that may have caught your eye before.
If you are new to the concept of blocking, and you would like to try it out before investing in new gadgets, rest assured that you can likely complete your blocking with stuff you’ve already got around the house.
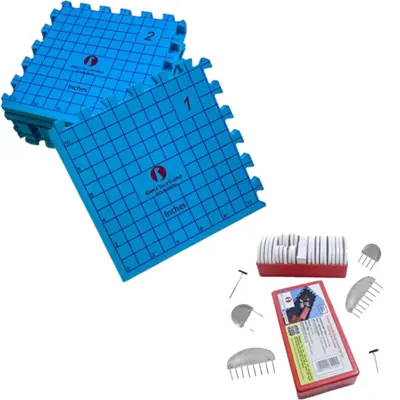
The bare minimum that you’ll need for basic blocking is water, a towel, some pins (I’ve even used push pins before) and something to pin your project onto.
Foam blocking boards can certainly be convenient, but a good old flattened cardboard box will also do the trick. You could also use an old yoga mat or a sheet of foam left over from packaging.
There are also a few other “nice to have” items that you may want to invest in the future.
If you’d like to try your hand at steam blocking, then you will also need a steamer or an iron with a steam setting. A blocking wire can come in real handy when it comes to blocking shawls.
And a simple spray bottle can help you wet your projects more lightly without saturating them.
How to Block
The science behind crochet blocking is actually really easy to understand. Do you know how when you “frog” or rip out a crochet project, the yarn isn’t straight anymore (it kind of looks like ramen noodles to me).
That’s because the fibers of the yarn have “memory” of the shape that they held when they were in the project. So, when you block your projects, you are setting a new shape for them to retain the memory of.
Learning how to block your crochet projects may seem like a daunting task, but the basic steps are super easy.
You’re going to get your project wet, lay it out the way you want it, pin it in place, and allow it to air dry. See? That isn’t so hard! We’ll go into more detail and talk about the different types of blocking in the next section.
Types of Blocking
Soak Blocking
Soak blocking is a great choice for crochet projects made from natural fibers like cotton, bamboo, wool and other animal fibers.
First, you fully immerse your project in water for 15-30 minutes so that it can become saturated. Then you will gently squeeze the excess water out. You can roll the project up in a towel and press down on the towel to get even more of the water out.
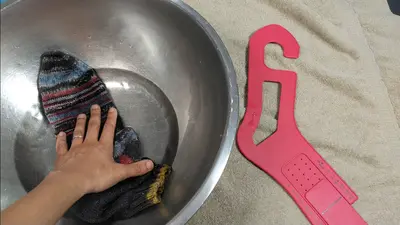
Be careful to never wring or twist the fabric of your project, as that can warp your work. When you have all the excess water out, you’re ready to lay it out and pin it.
Spritz Blocking
Spritz blocking is a quicker option for projects that only need a light blocking. It is also a good option for projects made with acrylic yarn.
Acrylic yarn is water-resistant so there’s not much point soaking it – a light spritz will do the trick! Just lay your project out on a towel and give it a quick once over with a spray bottle.
There won’t be any extra water to squeeze out, so you can move on to laying it out and pinning it.
Steam Blocking
Steam blocking is generally considered the best option for acrylic yarn. It really helps the fibers of the yarn to relax and can even increase the drape of your project, which is a huge benefit for crochet wearables and accessories like sweaters and shawls.
The steps for blocking using this method are a little bit backwards. First, you will lay out and pin your project, and then you will lightly steam it. The steam will slightly dampen the project, so you will still leave it out to air dry as with the other methods.

A garment steamer is a handy tool to have for this method because it gives you a lot of control over the application. An iron with a steam setting will also do the trick, just be sure to never actually press the iron down on the project!
(Acrylic yarn is made from plastic after all, and it can melt!) Hold the iron an inch or two above the surface of the work and slowly hover over the whole project.
Is Crochet Blocking Permanent?
The short answer is that, no, crochet blocking is not permanent. If you decide to wash your project at some point, then that will essentially “reset” the stitch memory.
At that point, you might want to lay it out flat to dry and pin it again to make sure that it still retains its shape. This isn’t always necessary, though, especially if the stitch pattern is quite simple.
That’s not to say that your initial blocking was all a waste of time! I don’t often wash my crochet projects anyway, since spot cleaning is usually enough.
So, I suppose that if you never really get your project wet again, then the original crochet blocking will basically be permanent.
This lack of permanence can also be a good thing. If you accidentally get your project wet and it dries in a weird shape, then all you have to do is block it again and you should be good to go!
Did you learn anything new about crochet blocking today? Do you have any other questions? I would love to hear from you in the comments below!
If you want to learn more about Crochet Blocking, check out this article HERE.
Follow the blog for more great content (and, of course, fabulous and free crochet patterns with helpful video tutorials!)