Santa Claus Crochet Pillow Pattern
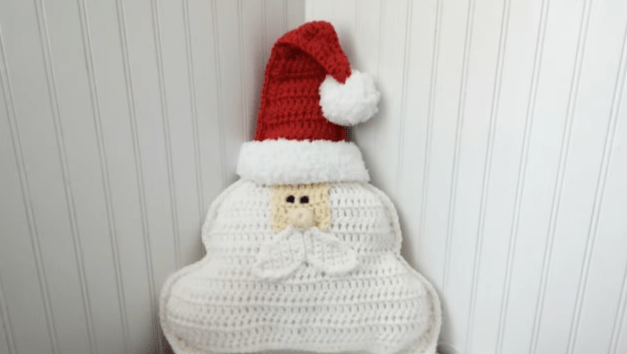
Are you looking for that crochet pattern that will even make the big guy envious? Don’t worry, I got your back. The Santa Claus crochet pillow pattern is super easy to make. It’s guaranteed to make any room look festive.
Size 24 inches (61 cm) X 16 inches ( 41 cm) wide. Santa Claus Crochet Pillow pattern.
Inspires by Annie’s Pattern Central Santa Pillow

- Get the ad-free, large print, printable PDF pattern HERE.
- Grab the Ultimate Pattern Bundle that includes 28 of my patterns just like this one for under $20 HERE.
- PIN this pattern to your Pinterest boards for later HERE.
- Add this pattern to your Ravelry queue HERE.

Santa Pattern Materials
Material
#4 Worsted weight yarn in red, white, & flesh tone
Santa Pillow Video Tutorial
Crochet Santa Claus Pillow Pattern
Stitches
Ch- Chain Stitch
Sc- Single crochet
Sc2tog- Single crochet 2 together
Hdc- Half double crochet
Dc- Double crochet
Dc2tog-Double crochet 2 together
*Note. Turning chains do not count as a stitch.
Number is () are stitch counts at the end of each row
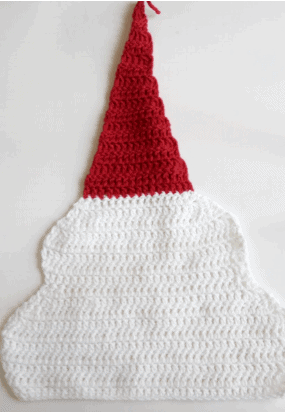
Font & Back of pillow Make 2
(Video 1:05)

(Color White) Ch 42
Row 1: Dc in the 3rd chain from hook, dc in each st across, turn. (40)
Row 2: Ch2, Dc in each st across, turn. (40)
Row 3-4: Ch 2, 2 dc in same stitch, Dc in each st across, 2 dc in last st, turn (42)(44)
Row 5-6: Ch 2, dc in each st across, turn (44)
Row 7-10: Ch 2, (Dc2tog) 2 times total . Dc across until last 4 sts. (Dc2tog) 2 times total, turn (40)(36)(32)(28)
Row 11-18: Repeat row 3-10 (30)(32)(28)(24)
(20)(16)
Row 19-20: (Video 7:43)(Color red). Ch 2, Dc across, turn. (16)
Row 21: Ch 2, dc2tog. Dc across until last 2 sts. Dc2tog, turn. (14)
Row 22: Ch 2, dc in each st across, turn. (14)
Row 23-36: Repeat rows 21-22
Stitches will decrease to a point to form the hat.

Face (video 12:20)
(Color flesh tone) Ch 10
Row 1: Dc in the 3rd ch from hook, dc in each st across, turn. (8)
Row 2-5: Ch 2, Dc each st across, turn. Fasten off, leave long tail for sewing (8)
Mustache Make 2
(Video 17:07)
(Color white) Ch 7
Row 1: Sc in 2nd ch from hook, sc across,turn
Row 2: Ch 1, sk 1, sc across. 2 sc in last st, turn.
Row 3: Ch 1, sc across. Sc2tog last 2 sts, turn.
Row 4: Ch 1, sc across. 2 sc in last st, turn.
Row 5: Ch 1, sc across, turn
Row 6: Ch 1, sk 1. Sc across, turn.
Row 7: Ch 1, sc across. Sc2tog last 2 sts, turn.
Row 8: Ch 1, sk 1. Sc across, turn.
Row 9: Ch 1, sk 1. Sc2tog, turn.
Row 10: Ch 1, slp st in last stitch. Fasten off.
Nose (Video 13:30)
(Color flesh tone) Wrap yarn 5x around pinky. Secure wrap with a sl st.
Round 1: Ch 1, sc around. Don’t join.
Round 2: Sc on top of the previous row sc
Round 3+: Repeat row 3 until center space is closed. Slp st to join.
Sew on Facial features according to picture or video (video 23:17)
Putting pillow together (Video 24:17)
Place front and back of pillow on top of each other. Attach yarn to bottom left of your pillow. You will be crocheting the back and front piece together. Match yarn with hat and beard.
Row 1: Ch 1, sc around entire pillow.(leave space for stuffing) Once stuffed, slp st to join. Fasten off your work
Brim (Video 26:33)
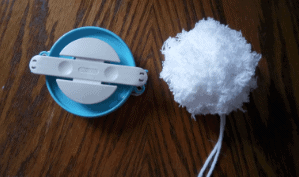
(Pipsqueak yarn) Ch 38, Slp st to join to form a circle
Row 1-4: Ch 1, hdc in each st around slp st to join. Leave long tail for sewing.
Sew Brim onto pillow

I hope you enjoyed this pattern. If you did, then you will love my Crochet Santa appliques. They make the perfect quick holiday decoration. Click HERE


