
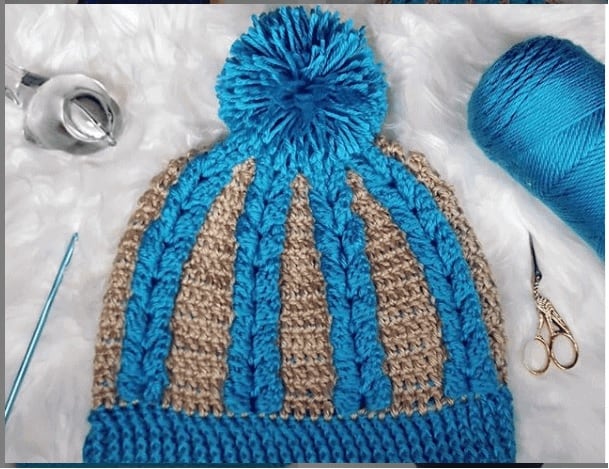
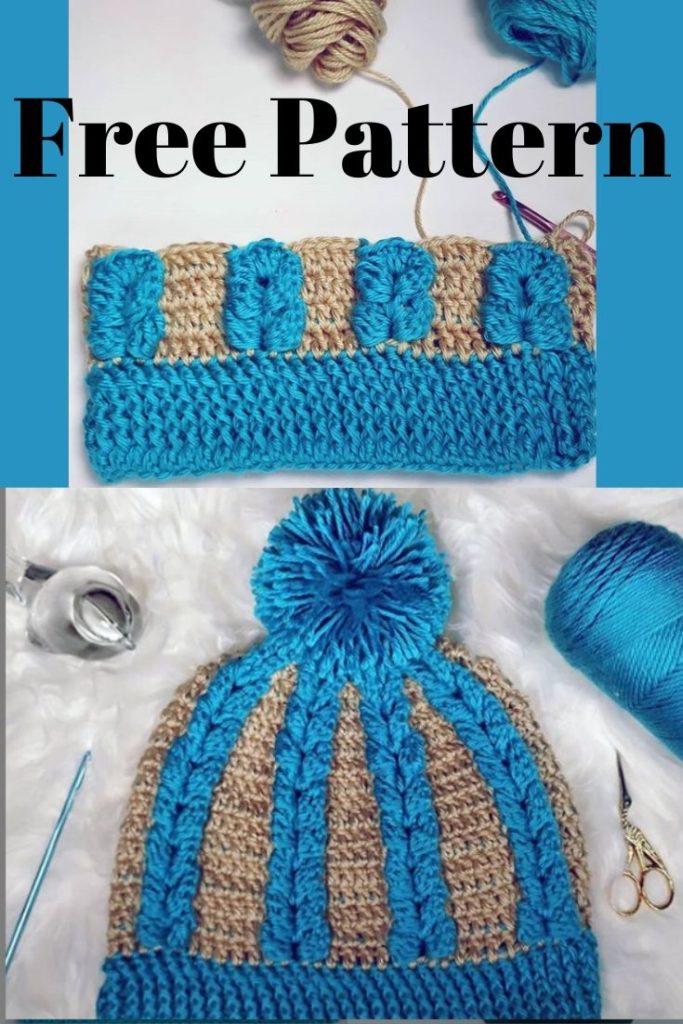
Braided Crochet Hat Pattern
Do you want to learn how to make this cool braided crochet hat pattern? Then you’ve come to the right place. I’m Littlejohn’s Yarns, I create new patterns every week.
In this tutorial, I’ll be teaching you the braid stitch. You have the option of using one or two colors. Warning, if are using two colors, your secondary color may show through, I personally like that.
The materials that will be using today are a 5 mm crochet hook & Caron Simply Soft which is a worsted weight yarn one in the color Iceland blue and bone.
I chose Caron Simply Soft because it works perfectly with this stitch. All #4 worsted weight yarns are not the same. The stitches lay flatter with a light worsted weight yarn. With heavier #4 worsted weight yarn such as red heart Super Saver, the stitches came out bulkier. The choice is yours
More hat patterns you may like:
Crochet Hat Video Tutorial
Braided Crochet Hat

Material
#4 Worsted Weight Yarn – Caron Simply Soft
-1 or 2 colors (I used blue and tan)
5 mm Hook
Embroidery Needle for Sewing
Note: all #4 worsted weight yarns are not made the same.
Caron simply soft is a lighter worsted weight yarn that gives these braids good stitch definition.
Abbreviations (US Terminology)
Ch- Chain Stitch
Sl St- Slip Stitch
Dc- Double Crochet
FPDC – Front Post Double Crochet
Dc2tog – Double crochet 2 Together
Fpdc4tog – Front Post Double Crochet 4 Together
Sc2tog – Single Crochet 2 Together
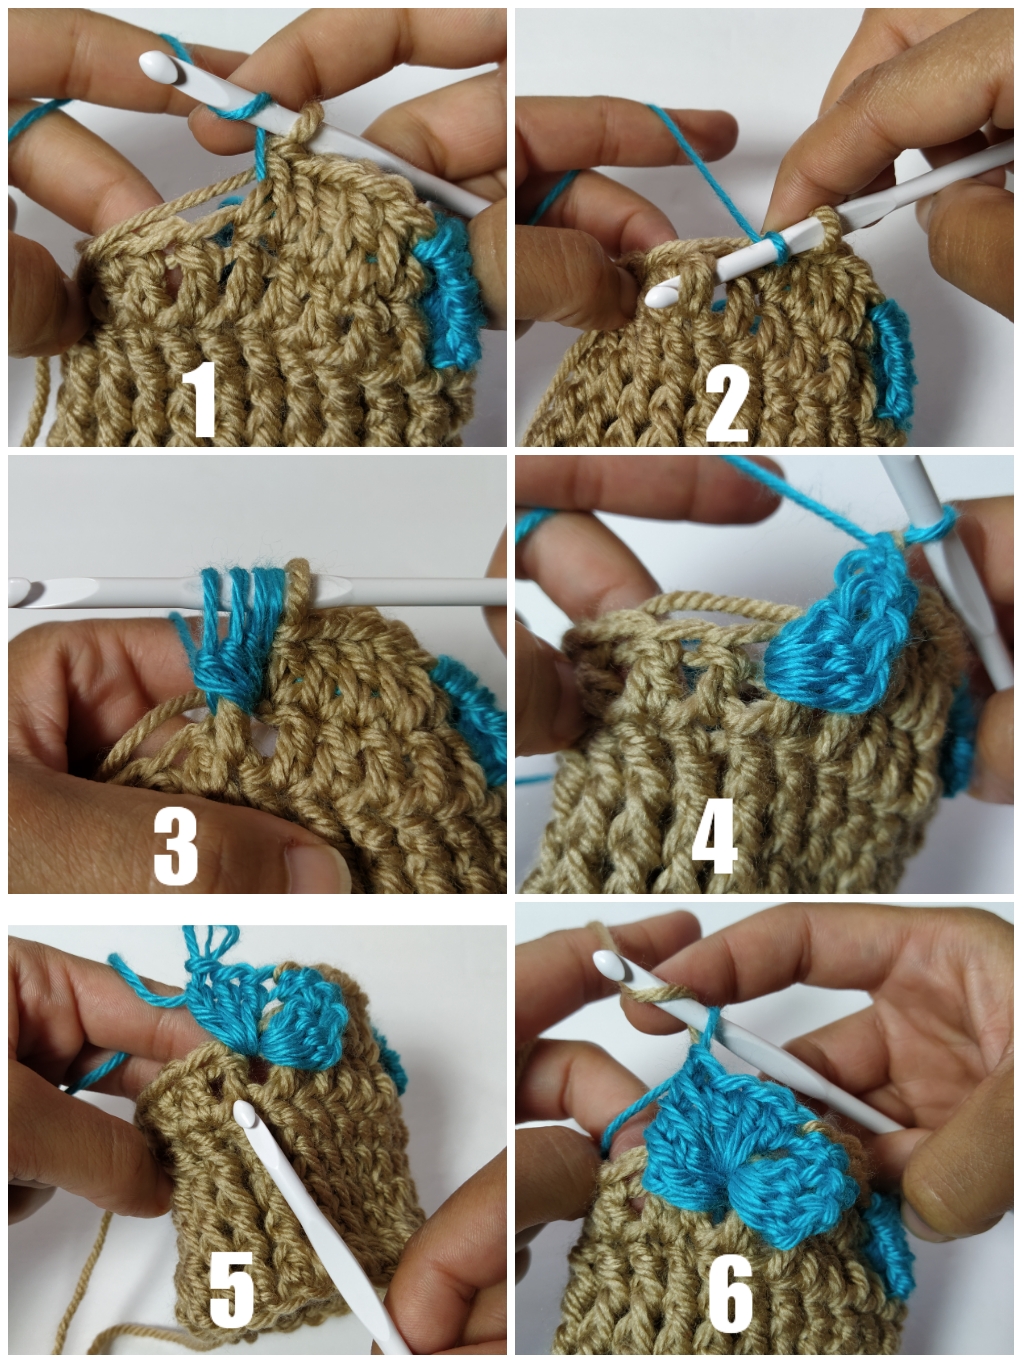
Special Stitches
Braid Stitch: modified fpdc4tog (yarn over, [go behind the post of the indicated st, pull up a loop, yarn over and pull through two loops] 4 times, [yarn over and pull through two loops] 4 times), 3 dc in the space between the current stitch and the next indicated st, modified fpdc4tog (yarn over, [go behind the post of that next stitch, pull up a loop, yarn over and pull through two loops] 4 times, [yarn over and pull through two loops] 4 times).
Notes
- Turning chains do not count as a stitch.
- Do not turn your work at the end of the round.
- Color changes: start your dc as normal: yarn over, insert your hook into the indicated stitch, pull up a loop, yarn over and pull through two loops, then yarn over with your new color of yarn to pull through the final two loops.
- Carry your non-working yarn along with you as you go to make switching back and forth between colors easier (expect where it indicated to drop the unused yarn behind your work)
Brim (Video 1:11)
Chain a multiple of 8. (48, 56, 64, or 72 – depending on the circumference of your head), Sl st to the first chain stitch, without twisting, to form a ring.
Round 1: (A) Ch 1, dc in the first st and each st around, sl st to join.
Rounds 2-5: Ch 1, fpdc in each st around, sl st to join. (Video 3:10)
Body (Video 4:35)
Round 6: (B) Ch 1, dc in each st around, sl st to join.
Round 7: (A) Ch 1, braid across the first 2 sts, (B) dc in the next 6 sts, *(A) braid over the next 2 sts, (B) dc in the next 6 sts, repeat from * around, sl st to join. (Video 6:35)
NOTE: Don’t switch to A at the end of the round. Drop yarn behind your work. You won’t be using it for the next round.
Round 8: (B) Ch 1, *dc in the space between the 1st modified fpdc4tog and the 3 dcs of the previous round’s braid (your hook will go from behind like a post stitch – Video 14:37), sk next 3 sts, dc in the space between the previous rounds 3 dcs and the 2nd modified fpdc4tog of the same braid, dc in the next 6 sts, repeat from * around, sl st to join. (Video 13:46)

Round 9: (A) Ch 1, *braid over the 1st dc and 3rd dcs from the Round 7’s dcs (the 3 dcs for your braid will go in the space between the 2 dcs from Round 8), (B) dc in each of the next 6 sts, repeat from * around, sl st to the first braid stitch. (Video 18:00)
Note: Don’t switch to (A) at the end of the round. Drop yarn behind your work. You won’t be using it for the next round.
Rounds 10-17: Repeat rounds 8-9 (you will have a total of 6 braids)
Decreasing Rows (Video 23:25. Please watch.)
Round 18: (B) Ch 1, *dc in the space between the 1st modified fpdc4tog and the 3 dcs of the previous Round’s braid, sk next 3 sts, dc in the space between the previous round’s 3 dcs and the 2nd modified fpdc4tog of the same braid, dc2tog across next 2 sts, dc in the next 2 sts, dc2tog across next 2 sts, repeat from * around, sl st to top of the first dc.
Round 19:(A) Ch 1, *braid over the 1st dc and 3rd dc from the Round 17’s dcs (the 3 dcs for your braid will go in the space between the 2 dcs from Round 18), (B) (dc2tog the next 2 sts) 2 times, repeat from * around, sl st to the first braid stitch. (Video 26:43)
Round 20: (B) Ch 1, *dc in the space between the 1st modified fpdc4tog and the 3 dcs of the previous Round’s braid, sk next 3 sts, dc in the space between the previous round’s 3 dcs and the 2nd modified fpdc4tog of the same braid, dc2tog the next 2 sts, repeat from * around, sl st to top of the first dc. Fasten off (B). (Video 30:43)
NOTE: Please watch video for this section.
Fpdc in the dc from Round19, 3 dcs in the space between the two dcs from Round 20
Round 21: (A) Ch 1,braid over the 1st dc and 3rd dc from the Round 19’s dcs (the 3 dcs for your braid will go in the space between the 2 dcs from Round 20), *yarn over, insert your hook into the next st and pull up a loop, yarn over and pull through two loops, yarn over, (go behind the post of the 1st dc of the 3 dcs from Round 19, pull up a loop, yarn over and pull through two loops) 3 times, (yarn over and pull through two loops) 4 times, 3 dc into the space between the two dcs from Round 20, modified fpdc4tog in 3rd dc from Round 19, repeat from * around, sl st to the first braid stitch. (Video 33:10)
Round 22-23: Ch 1, sc2tog all the way around, sl st to the top of the first sc2tog. (Video 37:40)
Finishing (Video 38:40)
Sew the hole closed.
Add a pom pom if desired!