
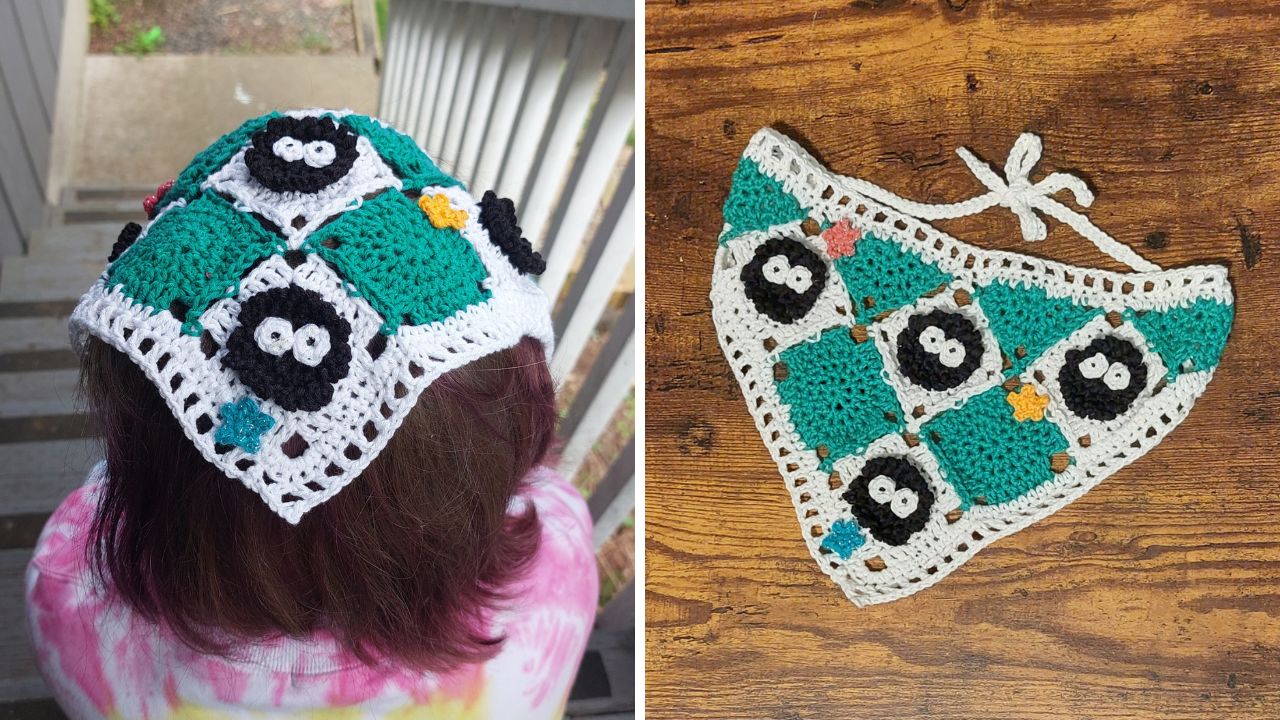
Fans of Studio Ghibli are sure to instantly recognize the loveable little balls of soot that are featured on this crochet granny square bandana design. As seen in movies like My Neighbor Totoro and Spirited Away, these fuzzballs steal every scene they are in with their absolute cuteness.
Now you can show off your love of Ghibli films and spot other Ghibli fans in the wild when they stop you to say, “Omg where did you get that bandana?!”
Granny square bandanas can be a bit of a daunting task when you think of all the sewing you’ll have to do at the end of the project. Lucky for you, these squares are joined as you go, so there’s no sewing!
- Get the ad-free, large print, printable PDF pattern HERE. Scroll down for the free version.
- Add this pattern to your Ravelry queue HERE.
Materials
- DK, light weight #3 yarn in black, white, and teal (I used Universal Yarn Bamboo Pop) plus colorful yarn scraps for the stars (DK weight or thinner).
- 4 mm & 2.5 mm crochet hooks
- Puffy paint or embroidery thread/thin yarn for adding details
- Tapestry needle
Finished Measurements
Each square measures 2.5” x 2.5” (6.5 cm x 6.5 cm)
Bandana measures 13” wide x 8” tall (33 x 20.5 cm) not including ties
Abbreviations
US terminology
- ch = chain
- ch-sp = chain space
- dc = double crochet
- hdc = half double crochet
- rep = repeat
- sc = single crochet
- sl st = slip stitch
- st = stitch
Special Stitches
Picot = ch 3, sl st to the third ch from the hook
Skill Level
Intermediate
Notes
- Ch 1 does not count as an hdc.
- Ch 3 does count as a dc.
- Instructions are given for attaching the squares using the join-as-you-go method, but feel free to crochet the squares separately and use a different attachment method.
Gauge
20 hdc x 14 rows = 4” (10 cm)
First Sprite Square
With 4 mm hook and black yarn, Magic Circle
Round 1: Ch 1, hdc 8 in the circle, sl st to the top of the first st to join. Pull tight on your starting tail to close the circle. (8 sts)
Round 2: Ch 1, 2 hdc in the first st and each st around, sl st to the top of the first st to join. (16 sts)
Round 3a: Working in the front loops only for the entire round, *picot and sl st to the next st, rep from * around, sl st to the front loop underneath the first picot stitch to join, fasten off. (16 picots)
Round 3b: Attach white in the back loop of the first st. Ch 1, working in the back loops only for the entire round, 2 hdc in the first st, hdc in the next st, *2 hdc in the next st, hdc in the next st, rep from * around, sl st to the top of the first st to join. (24 sts)
Round 4: Ch 1, hdc in the first 3 sts, dc in the next st, (dc, ch 5, dc) in the next st, *dc in the next st, hdc in the next 3 sts, dc in the next st, (dc, ch 5, dc) in the next st, rep from * 2 more times, dc in the last st, sl st to the top of the first st to join, fasten off. (28 sts)
Solid Square
With 4 mm hook and teal yarn, Magic Circle
Rounds 1-2: Follow the instructions for rounds 1-2 of the first sprite square.
Round 3: Ch 1, 2 hdc in the first st, hdc in the next st, *2 hdc in the next st, hdc in the next st, rep from * around, sl st to the top of the first st to join. (24 sts)
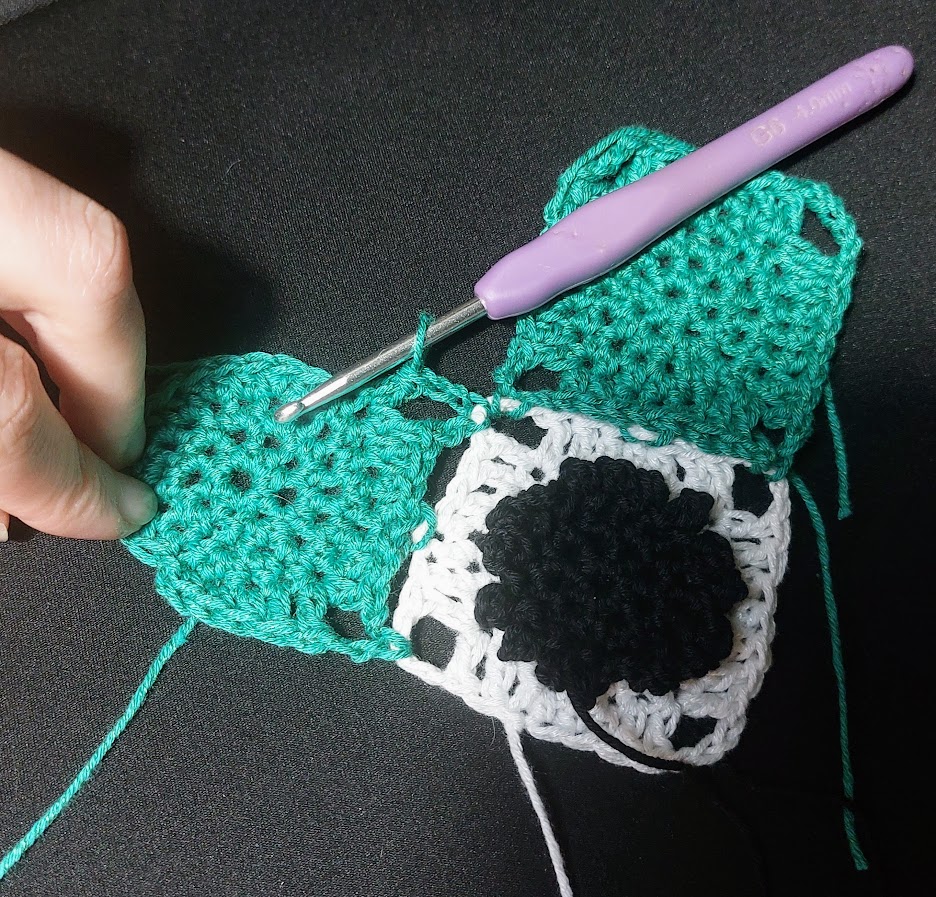
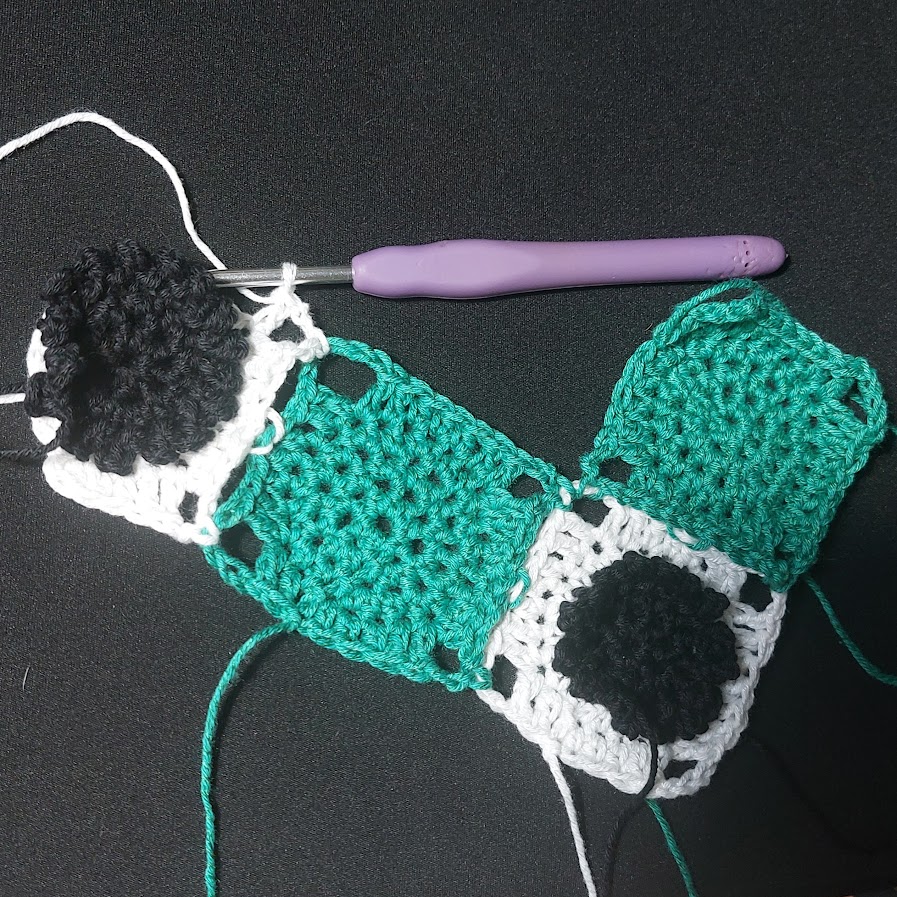
We’ll join our squares together during the next round.
Round 4: Ch 1, hdc in the first 3 sts, dc in the next st, (dc, ch 2, sl st to the ch-sp on the corresponding square you’re joining to, ch 2, dc) in the next st, dc in the next st, hdc in the next st, sl st to the middle hdc on the side of the corresponding square, hdc in the next 2 sts, dc in the next st, (dc, ch 2, sl st to the next ch-sp on the corresponding square, ch 2, dc) in the next st, *dc in the next st, hdc in the next 3 sts, dc in the next st, (dc, ch 5, dc) in the next st, rep from * 1 more time, dc in the last st, sl st to the top of the first st to join, fasten off. (28 sts)
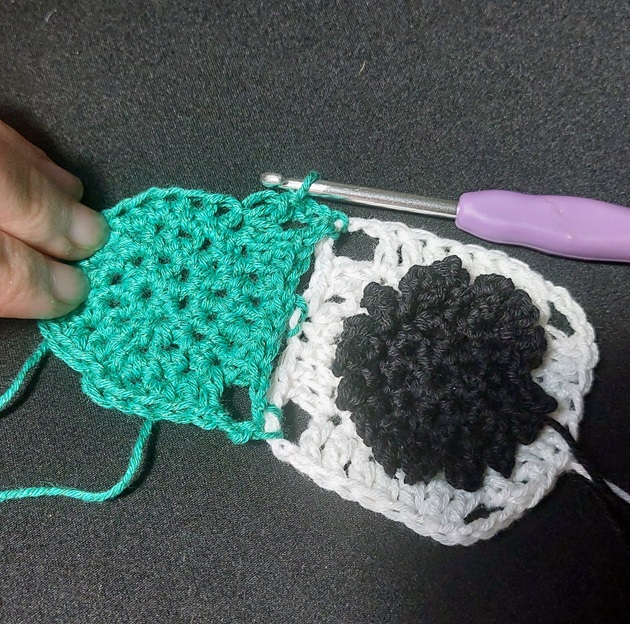
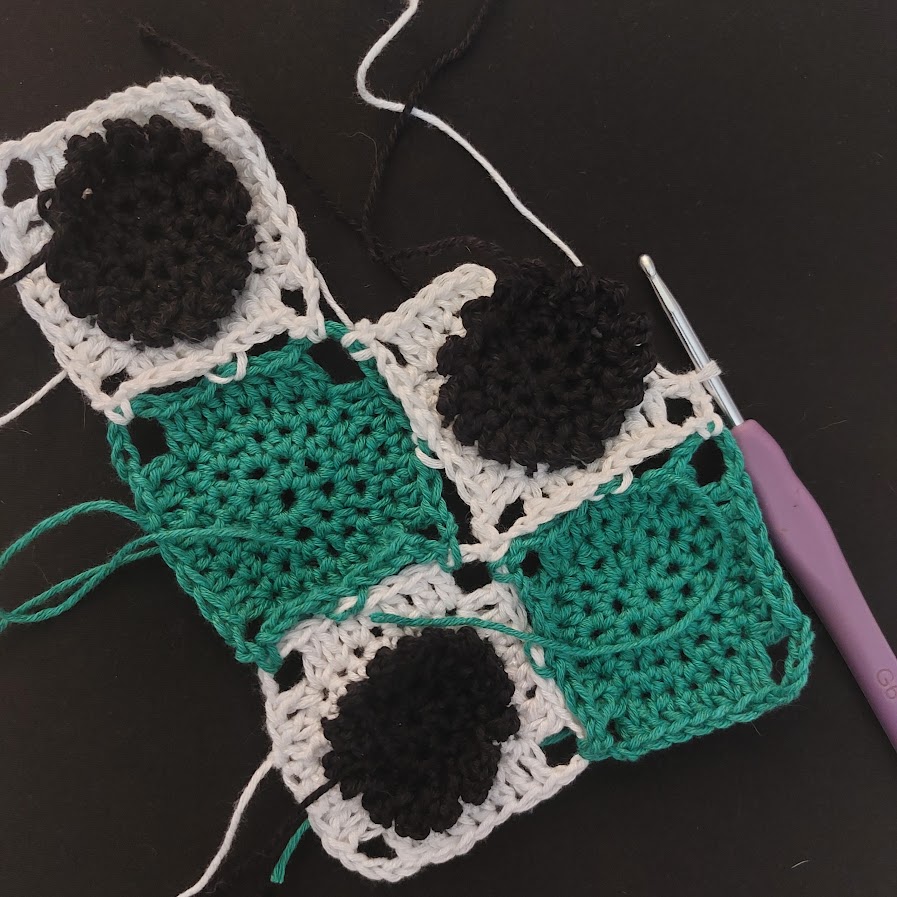
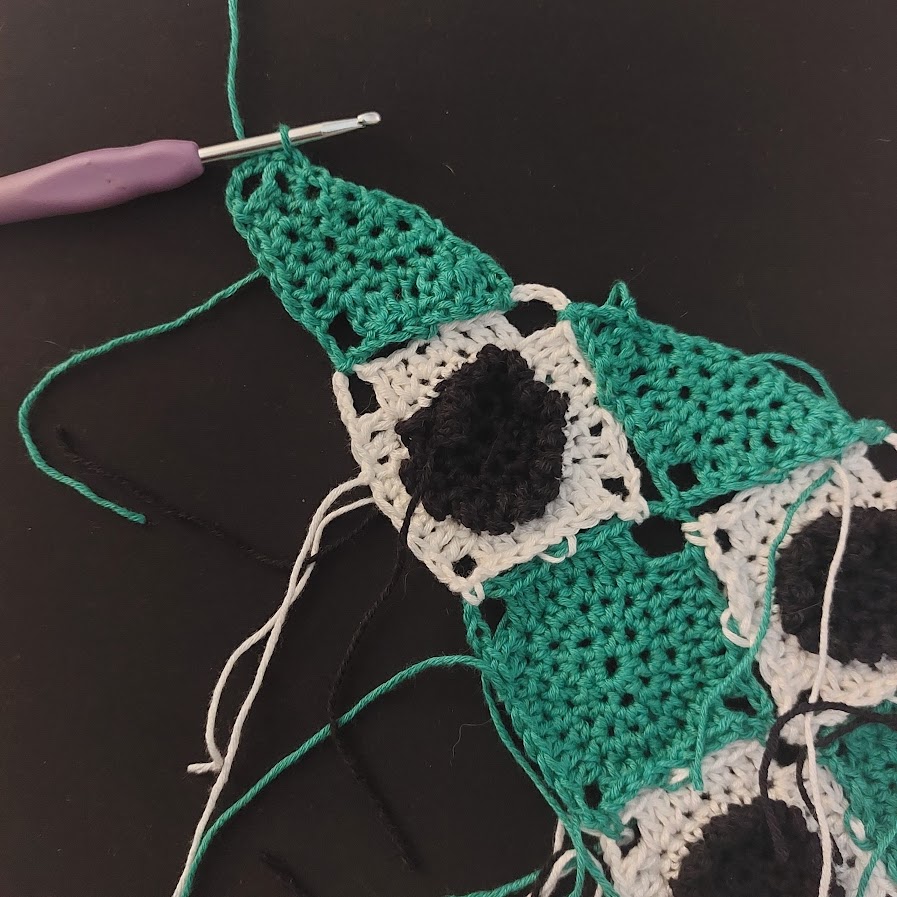
Make another solid square in teal and attach it to the side of the first square as shown.
Subsequent Sprite Squares
With 4 mm hook and black yarn, Magic Circle
Rounds 1-3b: Follow the instructions for rounds 1-3b of the first sprite square.
Round 4: Follow the instructions for round 4 of the solid square.
Attach the subsequent square as shown.
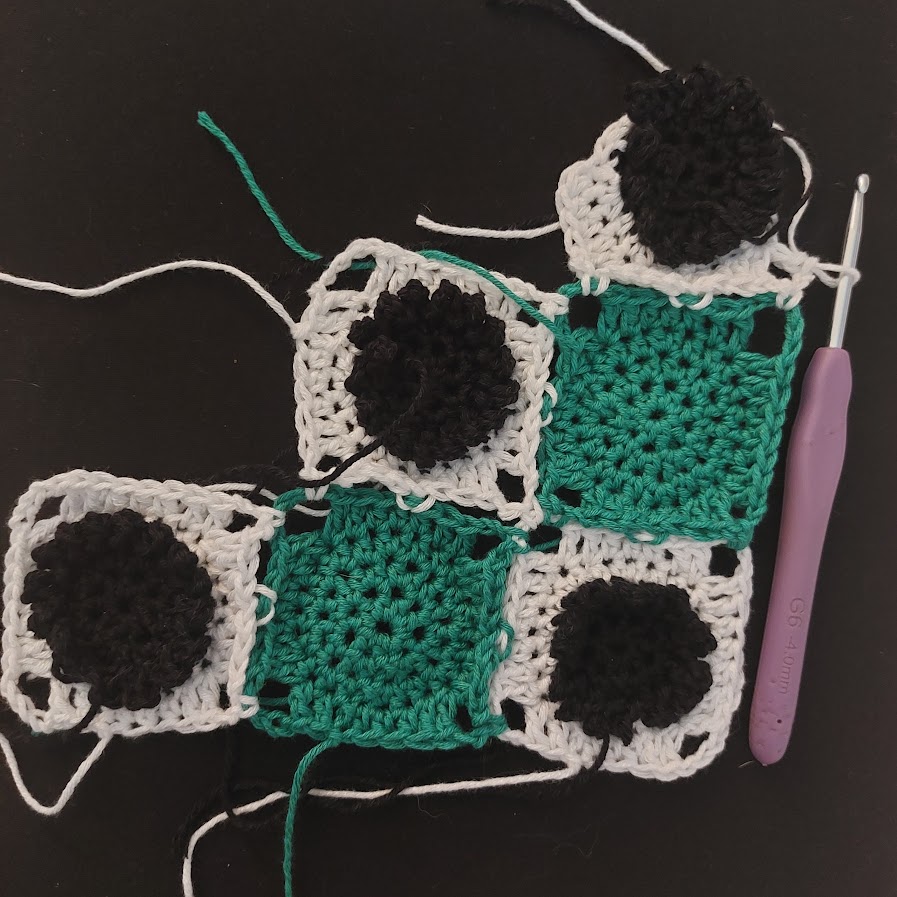
Make another subsequent square, following instructions for rounds 1-3b. In order to attach it on two sides as shown, follow the alternate directions for Round 4 (below).
Alternate Round 4: Ch 1, hdc in the first 3 sts, dc in the next st, (dc, ch 2, sl st to the ch-sp on the corresponding square, ch 2, dc) in the next st, *dc in the next st, hdc in the next st, sl st to the middle hdc on the side of the corresponding square, hdc in the next 2 sts, dc in the next st, (dc, ch 2, sl st to the next ch-sp on the corresponding square, ch 2, dc) in the next st, rep from * 1 more time, dc in the next st, hdc in the next 3 sts, dc in the next st, (dc, ch 5, dc) in the next st, dc in the last st, sl st to the top of the first st to join, fasten off. (28 sts)
Make another subsequent square following the original instructions for round 4 and attach it as shown.
Solid Triangles
With 4 mm hook and teal yarn, Magic Circle
Row 1: Ch 1, hdc 4 in the circle, turn. Pull tight on your starting tail to close the circle. (4 sts)
Row 2: Ch 1, 2 hdc in the first st and each st across, turn. (8 sts)
Row 3: Ch 1, 2 hdc in the first st, hdc in the next st, *2 hdc in the next st, hdc in the next st, rep from * across, turn. (12 sts)
Row 4: (ch 3, sl st to the ch-sp on the corresponding square, ch 2, dc 2) in the first st, hdc in the next st, sl st to the middle hdc on the side of the corresponding square, hdc in the next 2 sts, dc in the next st, (dc, ch 2, sl st to the next ch-sp on the corresponding square, ch 2, dc) in the next st, dc in the next st, hdc in the next 3 sts, dc in the next st, (dc, ch 3, sl st) in the last st, fasten off. (16 sts including the first and last ch 3)
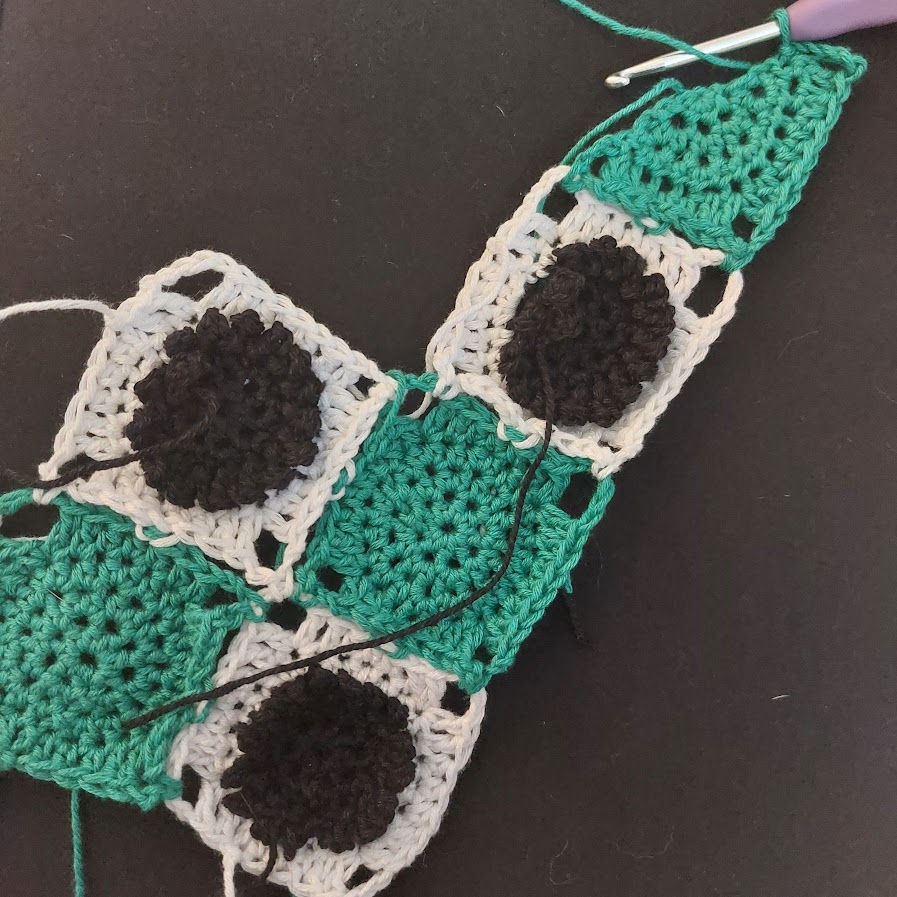
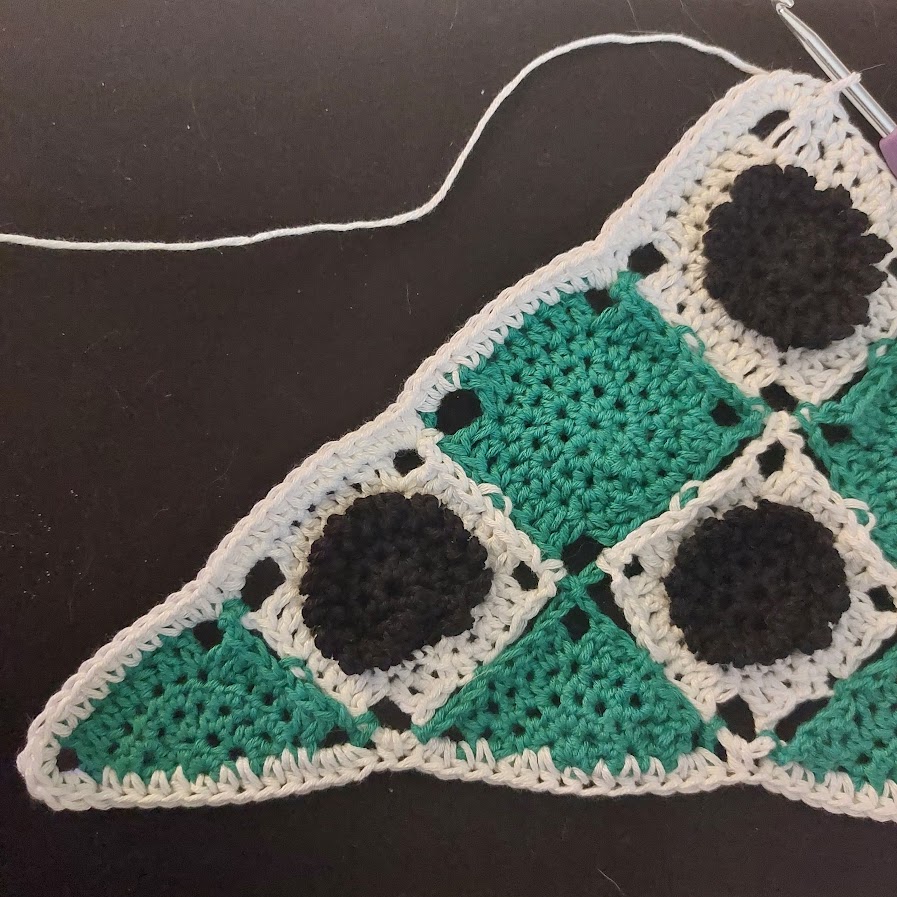
Attach your first triangle as shown
Make another solid triangle, following instructions for rows 1-3. In order to attach it on two sides as shown, follow the alternate directions for Row 4 (below).
Alternate Row 4: (ch 3, sl st to the ch-sp on the corresponding square, ch 2, dc 2) in the first st, hdc in the next st, sl st to the middle hdc on the side of the corresponding square, hdc in the next 2 sts, dc in the next st, (dc, ch 2, sl st to the next ch-sp on the corresponding square, ch 2, dc) in the next st, dc in the next st, hdc in the next st, sl st to the middle hdc on the side of the corresponding square, hdc in the next 2 sts, dc in the next st, (dc, ch 2, sl st to the next ch-sp on the corresponding square, ch 3, sl st) in the last st, fasten off. (16 sts including the first and last ch 3)
Make the next triangle in the same way as the last, similarly attaching it on two sides between the last 2 sprite squares.
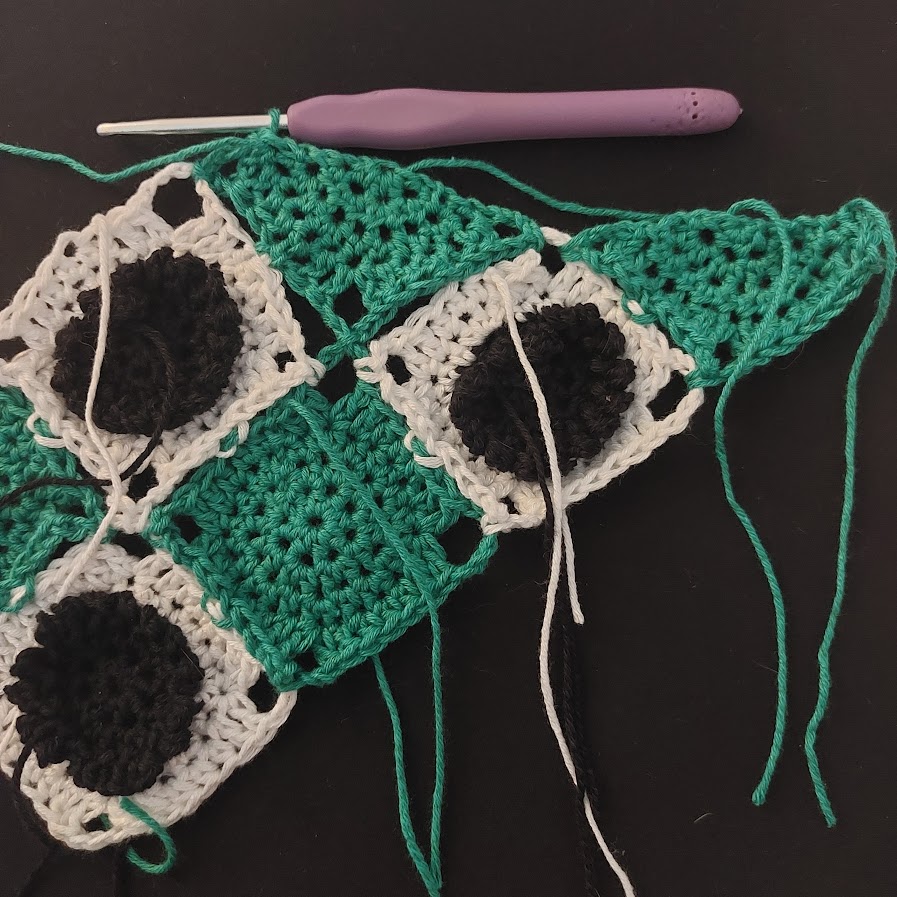
Make one last triangle as you did the first and attach it as shown.
Border
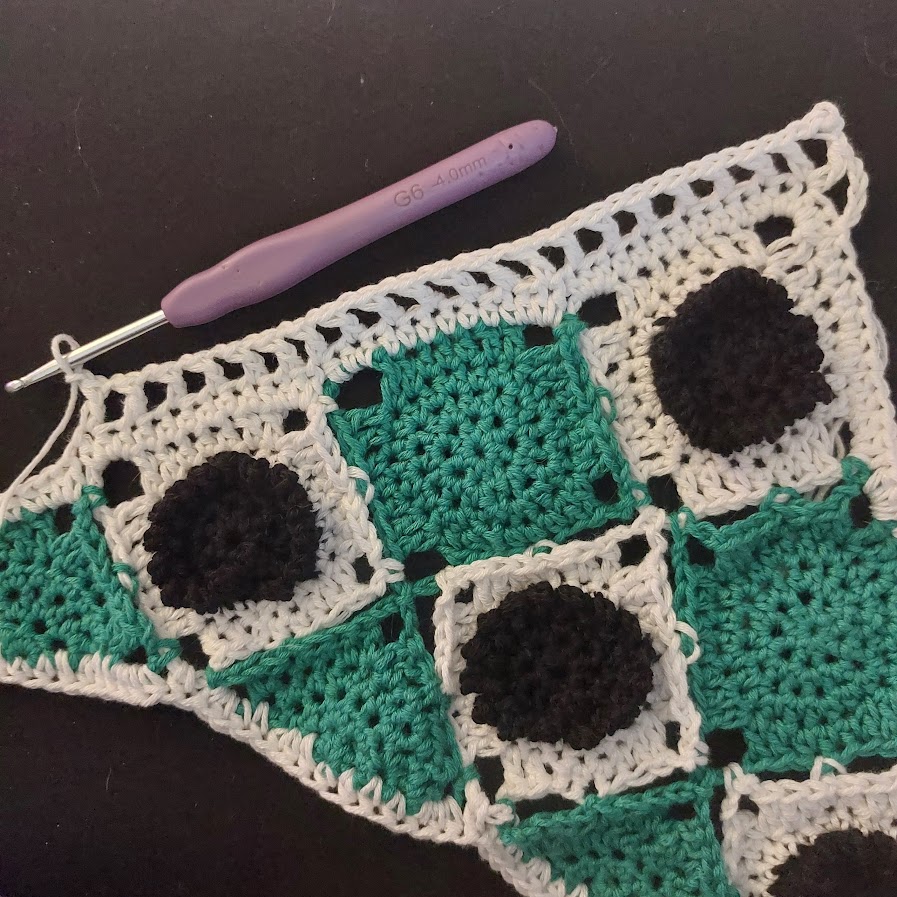
With 4 mm hook and white yarn, attach yarn in the bottom corner ch-sp.
Round 1: Ch 1, hdc 5 in the ch-sp, hdc in each st to next ch-sp, hdc 3 in each of the next 2 ch-sps, hdc in each st to next ch-sp, rep the underlined part 2 more times, hdc 5 in the next ch-sp, hdc in each st to next ch-sp, rep the underlined part 3 more times, hdc 5 in the next ch-sp, hdc in each st to next ch-sp, repeat the underlined part 3 more times, sl st to the top of the first hdc to join.
Round 2: Ch 4, sk the next st, (dc picot, dc) in the next st, *ch 1, sk the next st, dc in the next st, rep from * across to the next corner.
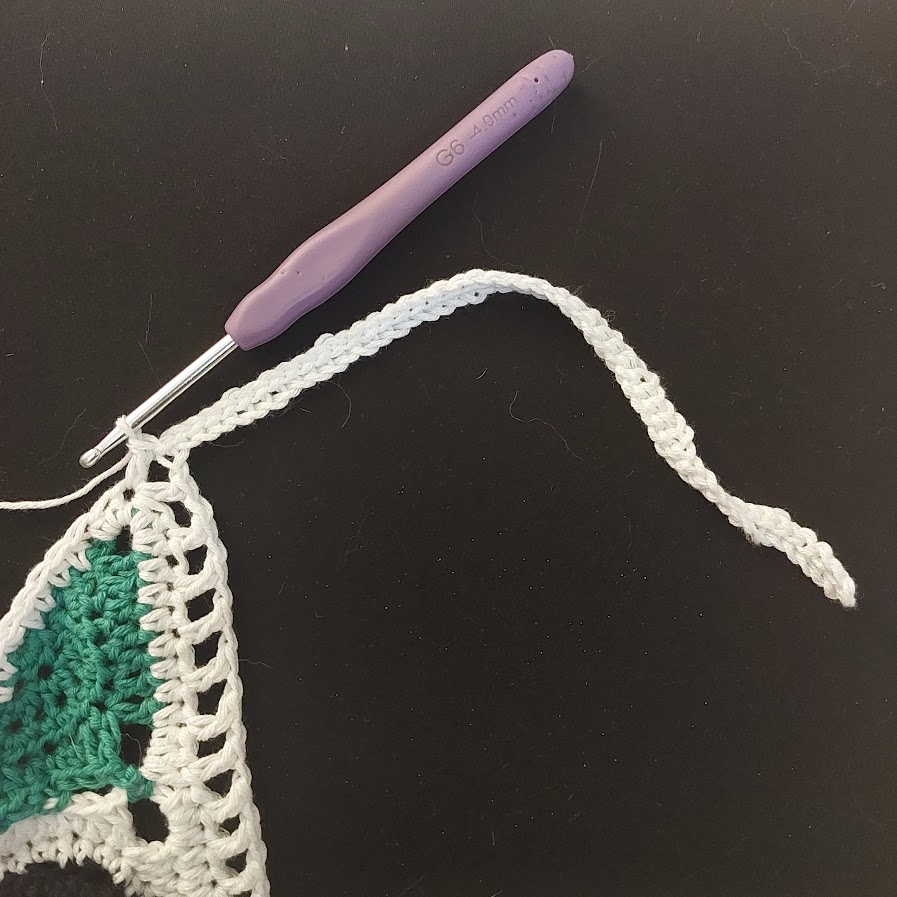
Work in the 5 sts of the corner as follows: dc in the first st, sk the next st, dc in the third st, ch 50, sl st in the second ch from the hook and in each remaining ch, dc in the third st again, sk the next st, dc in the 5th st
*ch 1, sk the next st, dc in the next st, rep from * to the next corner and work the underlined part again,
*ch 1, sk the next st, dc in the next st, rep from * to the end and sl st to the third ch to join, fasten off.
Sprite Eyes (Make 8)
With 2.5 mm hook and white yarn, Magic Circle
Round 1: Ch 1, sc 6 in the circle, sl st to the first st to join. Pull tight on your starting tail to close the circle, fasten off and leave a tail for sewing. (6)
Sew two eyes on each sprite square. Use puffy paint for the pupils or embroider French knots with black yarn.
Stars (Make 3)
With 2.5 mm hook and color of choice (I made one yellow, one blue, and one pink), Magic Circle
Round 1: Ch 1, [sc, picot] x5 in the circle, sl st to the first st to join. Pull tight on your starting tail to close the circle, fasten off and leave a tail for sewing.
Sew the stars on, using the sample photo from page 1 for reference.
Weave in all your ends and you’re ready to rock it!
____________________
Love this crochet pattern? You might like this other novelty crochet bandana pattern!
© 2025 Littlejohn’s Yarn. All rights reserved.
Originally designed by Nine Inspired, this pattern has found a new home with Littlejohn’s Yarn and is shared here with permission.