
Don’t feel like reading? Watch the full video tutorial & review above.
I’m back with another review. Everyone knows that I can’t resist a cool yarn gadget. So the Nostepinne was the next item to go in my shopping cart. When I look for crochet craft supplies, I try to think outside the box. I must say, after using this, it is NOT my favorite gadget.
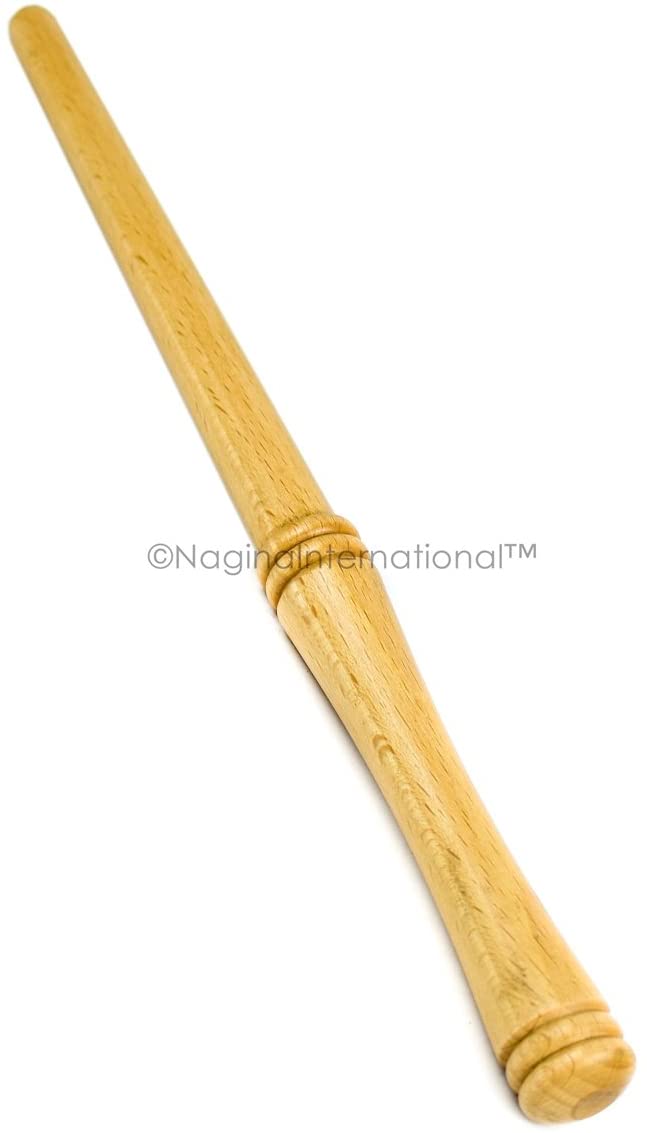
The one that I am showing was purchased from Amazon for $12. It doesn’t cost that much, but this is the most expensive wooden stick I have ever purchased!
“Nostepinne” or “nostepinde” is a Scandinavian word that translates to “nesting stick.” Just know it’s the OG, the grandmother of all Ball Winders. It is a device used to wind a middle draw yarn ball. A nostepinne is versatile, simple to use and makes a middle pull ball that can be utilized without changing the twist in the yarn.
What Is A Nostepinne
The nostepinne, otherwise called a nostepinde or nøstepinde, is an instrument utilized in the fiber arts to wind yarn, frequently yarn that has been handspun, into a ball for effectively sewing, stitching, or weaving from. In the simplest explanation, it’s a dowel. The dimensions are around 10 and 12 inches in length, typically made of wood which yarn can be wound around.
The top or bottom of the most nostepinnes has a grove or a notch which allows you to secure your working ball of yarn to the device. These notches ensure that there will be an easily accessible center pull ball.
The yarn that is formed by using a nostepinne is called a “center pull” ball, permitting the crochet or knitter to work the yarn from the center of the cake instead of the outside. Working with a center pull ball makes crafting life easier. You won’t have to worry about your ball rolling all over the place & picking up dust. The surface the yarn is perched on and gives a more predictable pressure. These center-pull balls are called “cakes” because of their short, cylindrical shape.

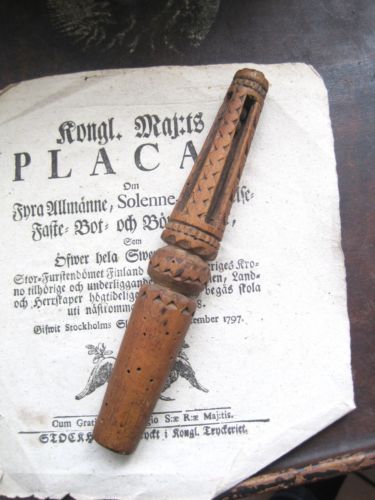
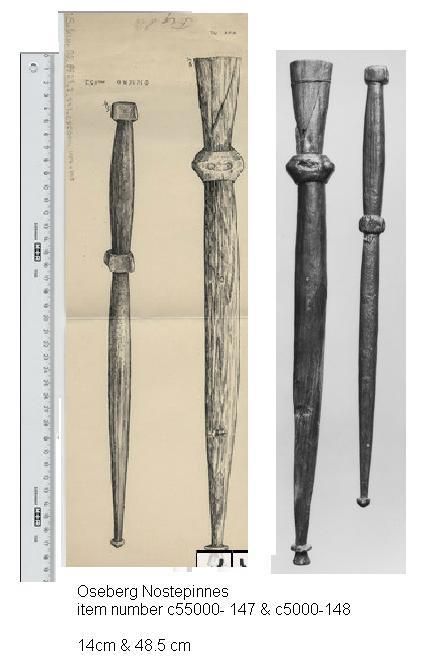
History Of The Nostepinne
“Nostepinne” has derived from Scandinavia and in Norway, it is really called “Nøstepinne” where the “ø” is pronounced like the “u” in “hurt”. In Sweden, it is called “Nystepinne”.
In Norway traditions, the nostepinne has had more than one purpose throughout their history. They were often given away as gifts.
Historically, the first woman to walk into the barn after the woodcarving or logging, received a nostepinne.
Young men also gifted these handcrafted nostepinne to the young women that they were interested in (some girls like jewelry). The more ornate the wood, the more skilled the craftsman, lol.
These nostepinnes were also used as baby rattles. It’s been said that these rattle nostepinne were carried by maids. The rattle from the nostepinne would ensure that the maids were working.
Nostepinne were also given as engagement presents. They would have carved locks, with the woman’s initials and the wedding date on the other side. At the top would be the husband’s initial.
Women would attach the nostepinne to the lining of their skirts. They would hang the yarn ball for easy crocheting or knitting on the go.
How To Use A Nostepinne
It is a lot simpler to show you than to just type about the nostepinne. Feel free to watch the video tutorial above for step-by-step instructions.
Step 1: You will be holding the nostepinne in your less dominant hand and working the yarn in your dominant hand. Whatever feels best will be what works for you.

Step 2: Begin by creating a slip knot & securing it to the notched groves on the Nostepinne. While holding the Nostepinne, prepare to wrap the yarn away from your body.
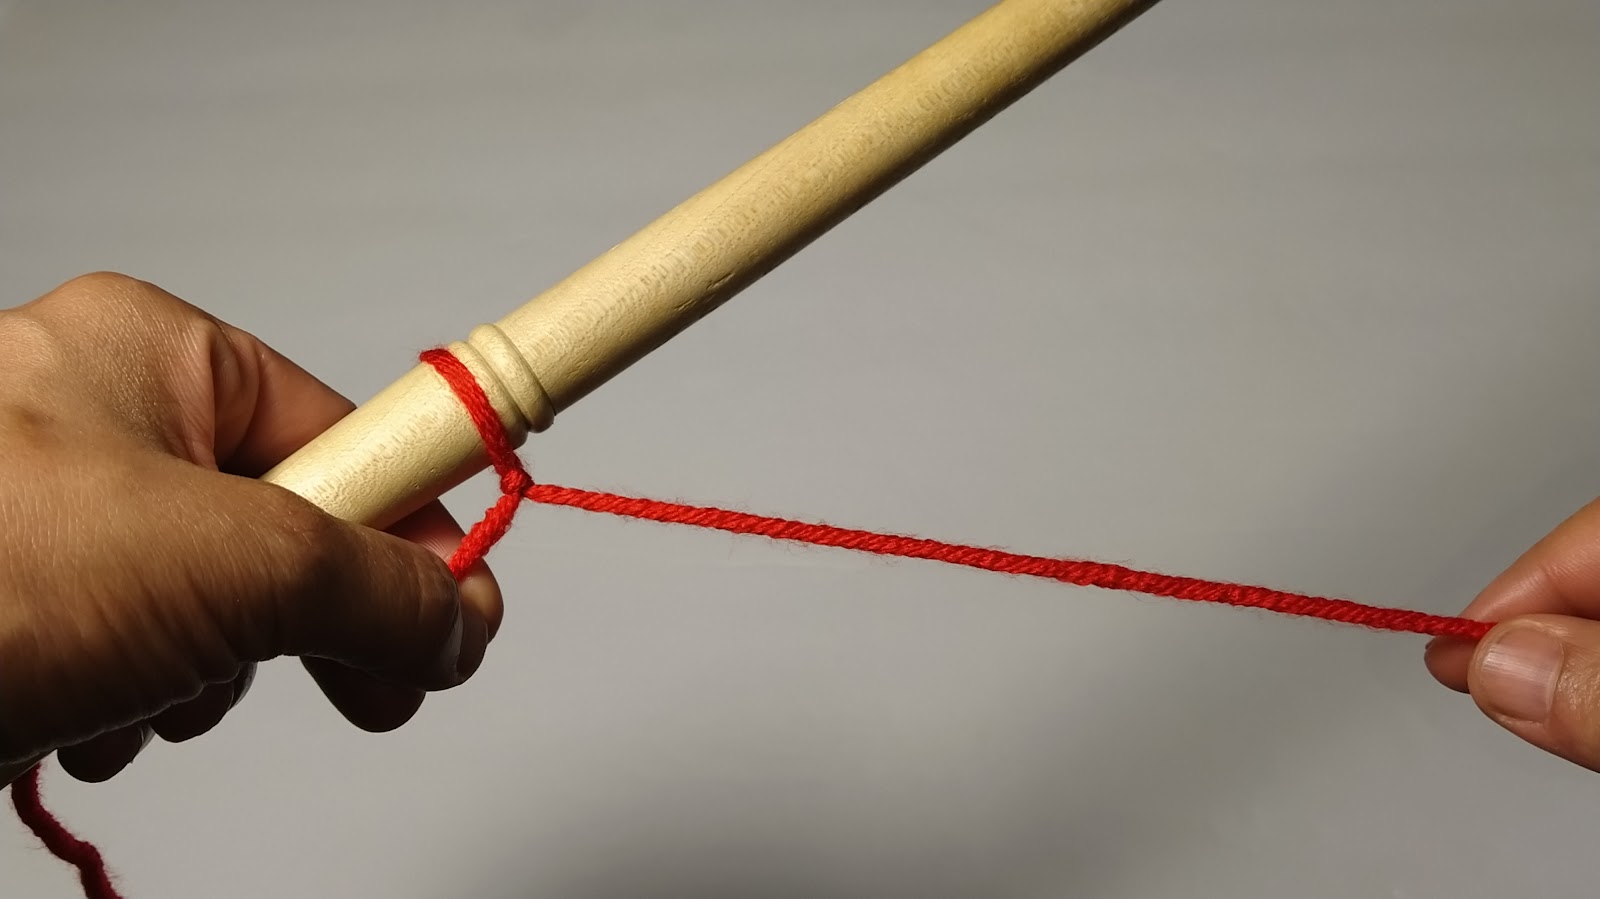
Step 3: Start wrapping the yarn around the middle of your nostepinne, by making continuous wraps 1 inch apart. This is the inside of your yarn ball, and you need to monitor it. This piece is the secret sauce to your “center pull” ball.
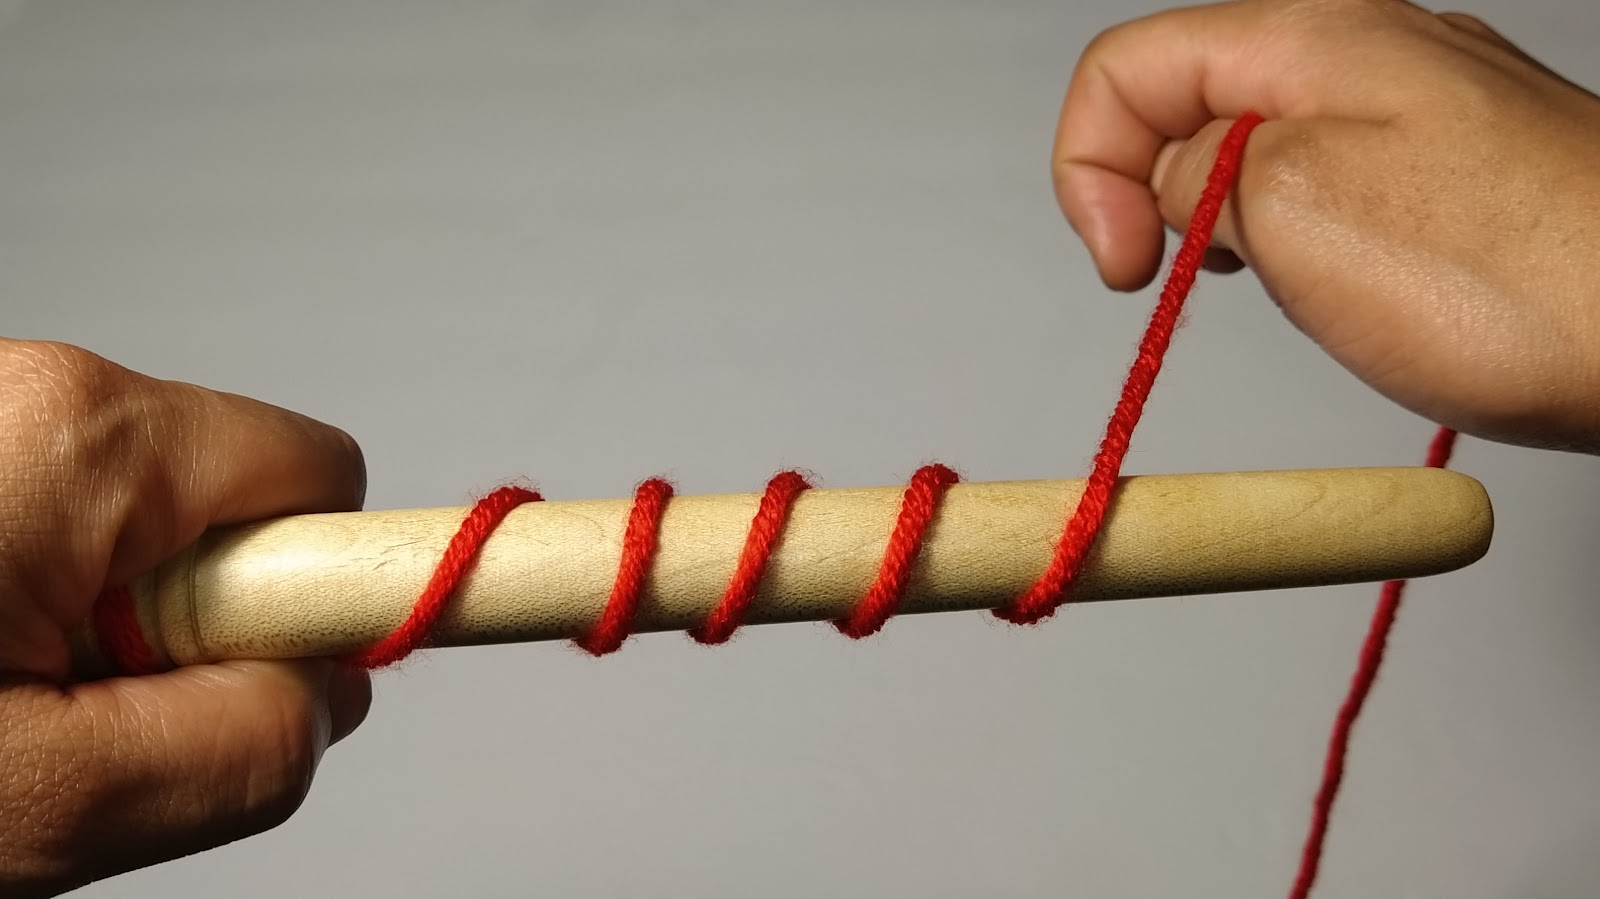
Step 4: Push wrapped yarn together.

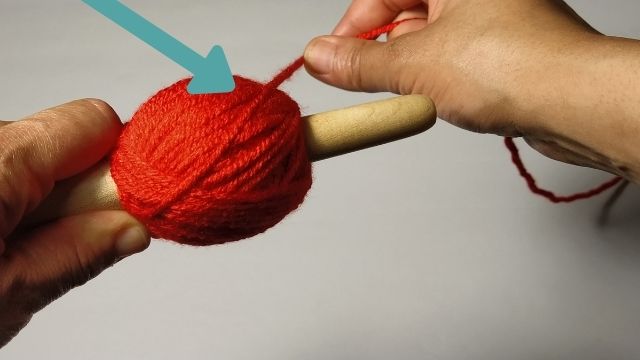
Step 5: Begin wrapping the yarn diagonally back towards your opposite hand, touching the opposite side of the wood (you’ve created half of an “X” across the original wraps).
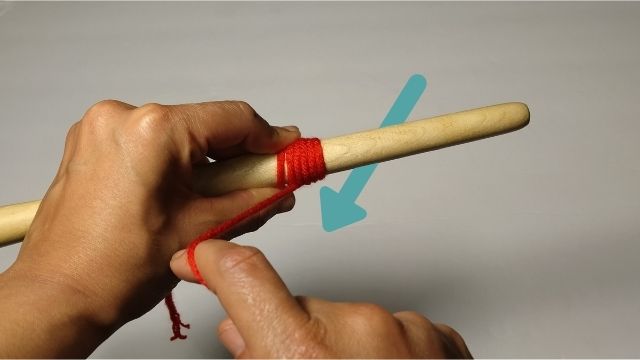
Step 6: Next wrap yarn diagonally toward the tip of your nostepinne, touching the opposite side of the woods. This creates the second cross of the “X.”
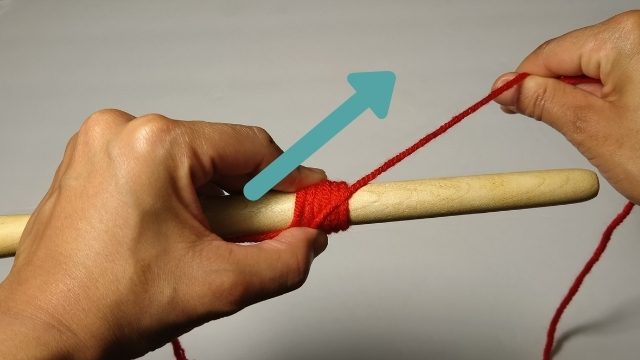
Step 7: With the hand that is holding the nostepinne, begin to turn it towards your body.
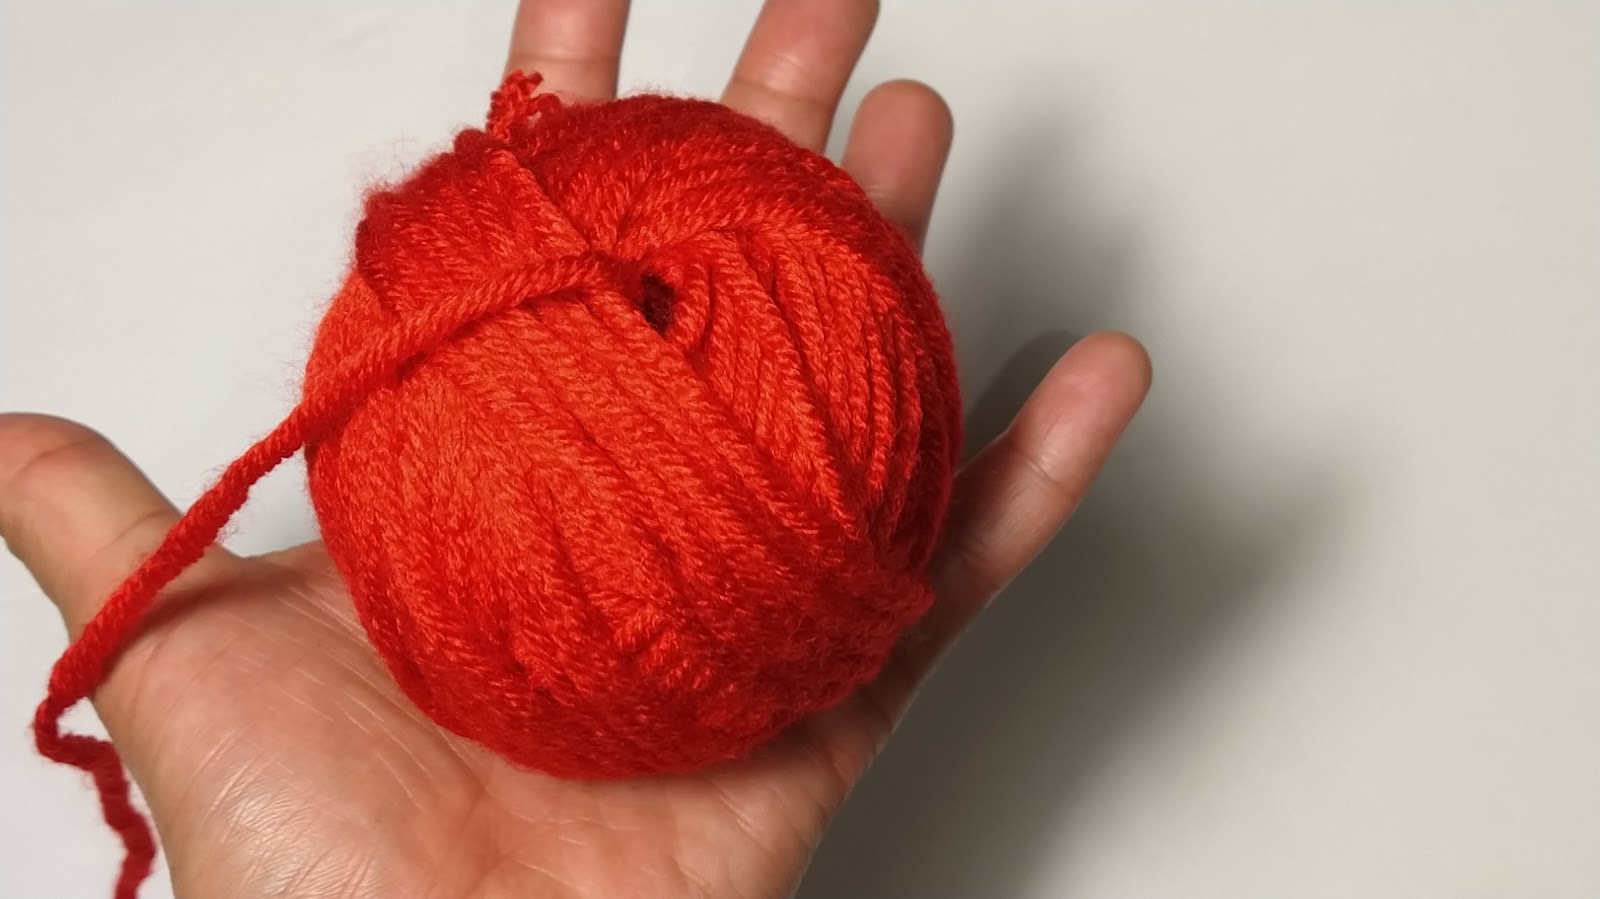
Step 8: Now repeat, all steps until your yarn forms an egg shape. You can continue to wrap in this manner. If you would like to form a cake shape, move on to step 9.

Step 9: Continue with the previous listed step, but for Steps 5 & 6, do not touch sides of wood when wrapping. Keep wrapped yarn on the ball itself. This is how a cake is formed.

The wrapping movement will feel off-kilter from the start, but it does get easier with each rotation. Eventually, it will become quicker. Playing around with you your yarn placement & nostepinne turning. The more you wrap, the better your cake will look.
Final Review
Wrapping a nostepinne can be very time-consuming and tedious. I personally prefer using a mechanical yarn ball winder. Life is so much easier with one. A cheap mechanical yarn ball (the one I use) is the same price.
I don’t recommend using this labor-intensive tool. It just takes entirely too long to create a simple center-pull ball. It’s a nice piece if you want to have something decorative in your house or if you are a stickler for history.
Happy Crocheting!
Psst… If you love free crochet patterns (who doesn’t???) make sure to follow the blog on Facebook, Instagram, Youtube, or Pinterest! Littlejohn’s Yarn posts original designs and free crochet pattern round-ups often for you to enjoy.
