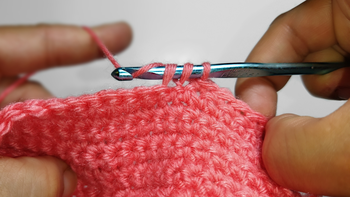
Are you ready to elevate your crochet? Invisible sc decrease allows you to effortlessly tidy up your stitches and really take your skills to the next level. Increasing and decreasing stitches are ways of shaping your crochet. But, there’s no denying it – they can be bulky and aren’t the best looking sometimes.
Imagine my delight when I learned about “The Crochet Invisible Decrease” method, in which you can’t even tell that the stitches are decreasing- there are no holes or bumps in sight!
Sometimes it’s difficult to make decreases look neat and even. I created this tutorial to show you how it can be done without drawing attention to the decrease–they’re virtually invisible.
Methods of Single Crochet Decrease
In crochet, there are three methods of working a decrease:
- Skip a stitch -In the first method, one stitch is worked as a decrease and unfinished stitches are left as they were. Basically, you are skipping a stitch.
- Sc2tog- In the second method, two stitches are worked into one stitch for decreased stitch.
- Invisible Crochet Decrease- Two stitches are worked into one using only the front loops. It’s important to know the difference between both loops when you are crocheting. The outer loops are called front loops. These’ll be the ones on the edge nearest to you. The inner loops are called back loops. These’ll be those behind, or towards your back.
When to use the Crochet Invisible Decrease
As mentioned before, this technique works perfectly on amigurmi projects, due to the decreasing necessary to achieve the shape. But this isn’t the only time that you are able to use it!
I’ve personally used it on any project that needed a sc decrease! Hats, mittens, slippers & blankets. If you want your finished crochet items looking neat, then read ahead.
How To Decrease In Crochet
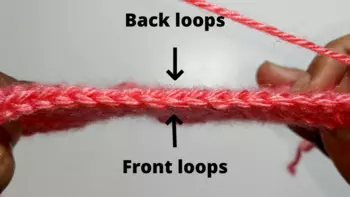
It’s also important to note that this technique only works with the “right” side of amigurumi. The Invisible Decrease technique is best done with the “front” loops facing outwards, so point them in whichever direction you need.
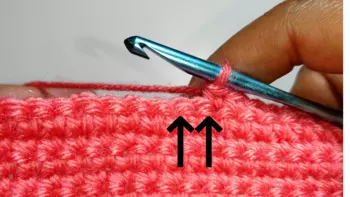
Use the front loops of the next two stitches to create the invisible crochet decrease.
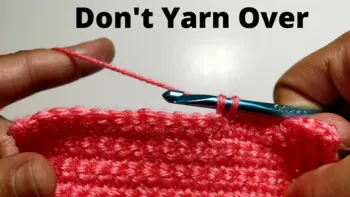
1. Insert the hook into the front loop of the first stitch (2 loops on hook).
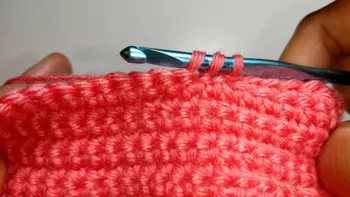
2. Insert the hook into the front loop of the next stitch (3 loops on hook)
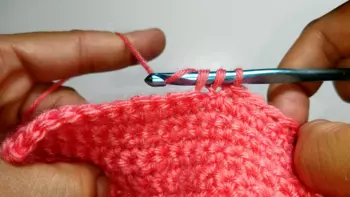
3. Yarn over and draw through the first two loops on the hook (2 loops on hook).
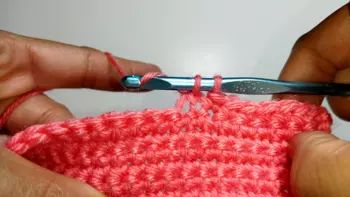
4. Yarn over and draw through both loops on the hook.
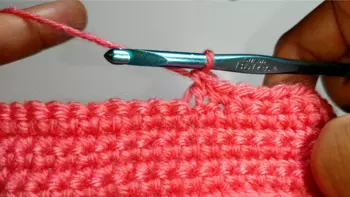
5. Invisible decrease completed.
Invisible Decrease for left-handers
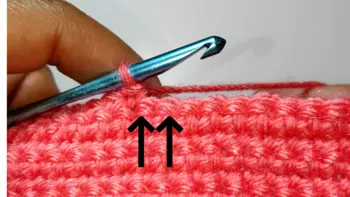
Use the front loops of the next two stitches to create the invisible crochet decrease.
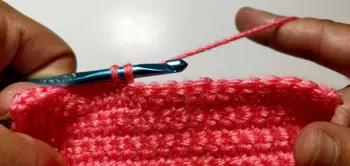
1. Insert the hook into the front loop of the first stitch (2 loops on hook). Don’t yarn over
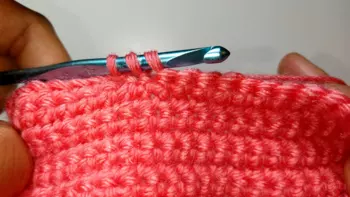
2. Insert the hook into the front loop of the next stitch(3 loops on hook)
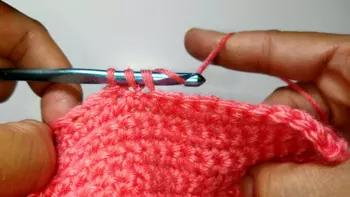
3. Yarn over and draw through the first two loops on the hook (2 loops on hook).
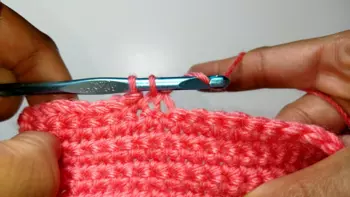
4. Yarn over and draw through both loops on the hook.
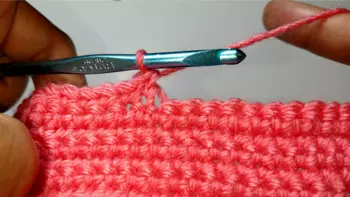
5. Invisible Crochet completed
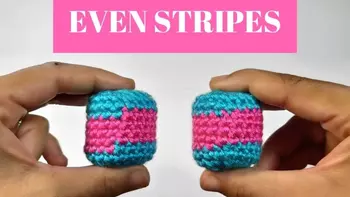
If you enjoyed the invisible crochet decrease, you’ll definitely want to check Crochet Jogless Stripes. Take your amigurumi to the next level!
Happy Crocheting!
Psst… If you love free crochet patterns (I know…duh) make sure to follow my blog on Facebook, Instagram, or Pinterest! Littlejohn’s Yarn posts original designs and free crochet pattern round-ups regularly for you to enjoy.

