
Looking for an easy crochet bucket hat pattern using chenille yarn? This beginner-friendly tutorial will show you exactly how to crochet a soft, cozy bucket hat step by step. Whether you’re new to crochet or just want a quick project, this pattern works up fast and includes a full video tutorial to guide you.
Super bulky yarn makes quick work of this soft chenille bucket hat. The pattern only has 14 rounds for child size and 15 rounds for adult size so you can crochet it in about an hour.
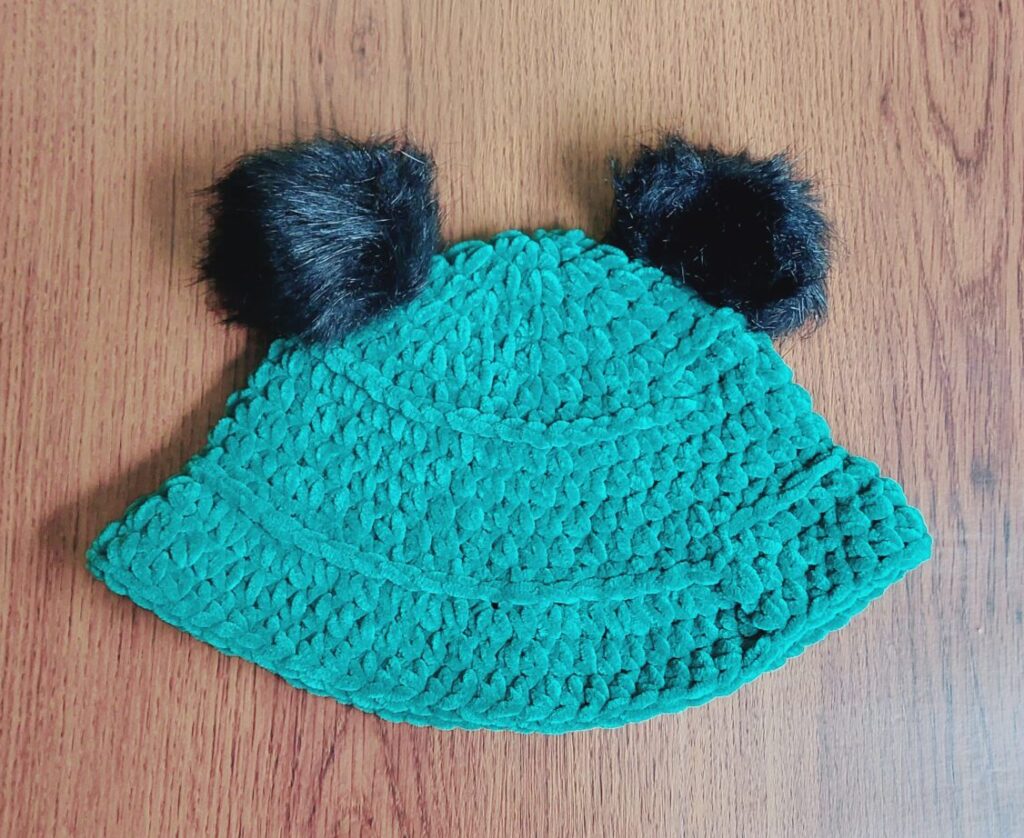
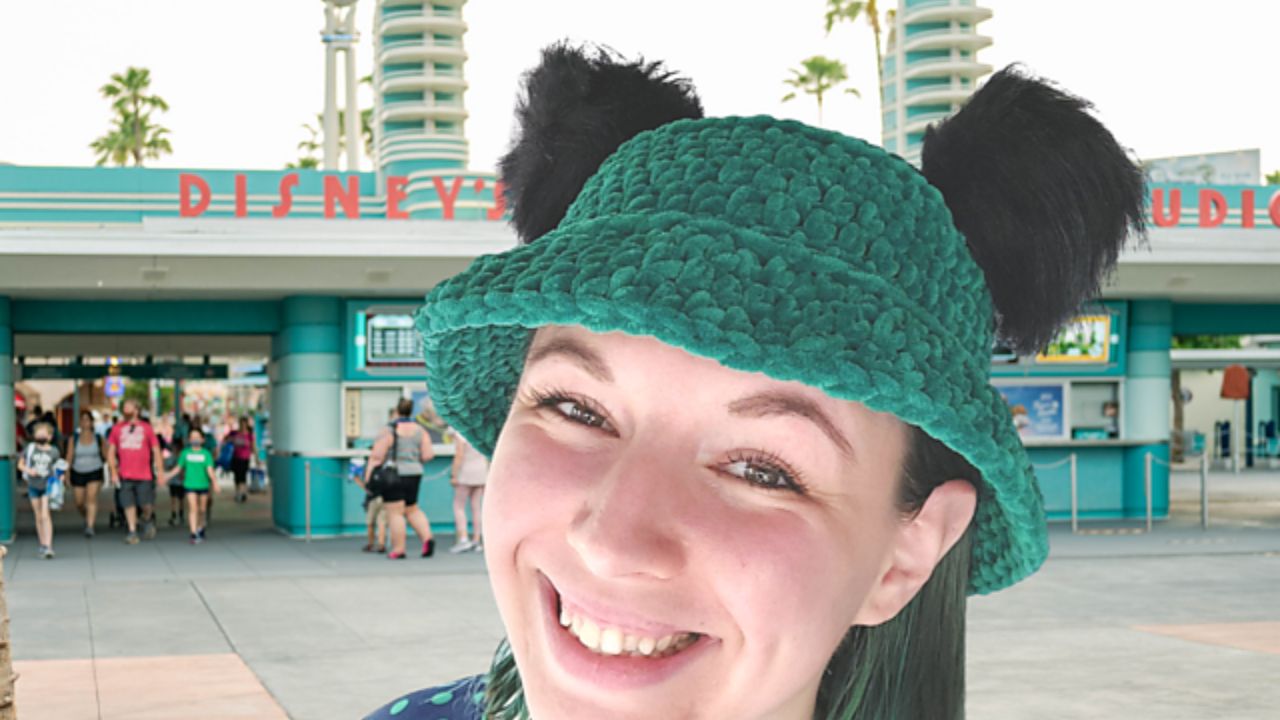
Adding the double pom poms is the perfect finishing touch – especially when you choose black faux fur poms because they look like the ears of a certain famous mouse! (who shall not be named for copyright reasons lol)
The best part about this tutorial on how to crochet a bucket hat is that there is no sewing involved (ain’t nobody got time for that!) Unless you count the buttons that you sew on the inside to attach the poms so they are removable.
I know that chenille yarn gets a bad wrap for being difficult to work with, but it really just takes some getting used to. The softness and sheen are unparalleled, so I find that chenille yarn really elevates the projects I use it on.
Plus, if you can’t see your stitches, then neither can anyone else. So if you miss one or add one here and there, you really can’t tell. In this way, chenille yarn can actually be very forgiving! So it really might not be as tricky as you think to learn how to crochet a bucket hat with chenille yarn.
- Get the ad-free, large print, printable PDF pattern HERE. Scroll down for the free version.
- Add this pattern to your Ravelry queue HERE.
How to Crochet a Bucket Hat with Chenille Yarn
Materials for Crochet Bucket Hat with Chenille Yarn
- Premier Parfait Chunky Chenille (Super Bulky #6, Emerald)
- 8 mm Crochet Hook
- Stitch Markers
- 4” (10 cm) Pom Pom x2
- 0.5” (1.5 cm) Button x2
- Sewing Needle & Thread
Skill Level
Intermediate
Crochet Bucket Hat Sizing
Child: 6.5” crown (16.5 cm)
7.5″ height (19 cm)
Adult: 7.5” crown (19 cm)
8.5” height (21.5 cm)
To adjust sizing, simply increase or decrease your crown rounds before moving to the sides.
Stitches Used in This Bucket Hat Pattern
US Terminology
- ch = chain
- st = stitch
- sl st = slip stitch
- sc = single crochet
- hdc = half double crochet
Special Stitches
Gauge
The first three rounds of the pattern should be approximately 3.5” (9 cm) in diameter.
Notes
Pattern is worked in continuous rounds. Don’t join at the end of a round, just keep going. Use a stitch marker to keep track of your rounds. Child and adult size instructions for how to crochet a bucket hat are completely separate so they’re easier to keep track of. Just scroll down if you’re looking for the adult size.
Child Size
Start with a magic circle
Round 1: Ch 1, hdc 8 in the circle. Pull on your starting tail to close the magic circle. (8)
Round 2: 2 hdc in each st around. (16)
Round 3: *2 hdc in the next st, hdc in the next st* repeat the starred section for a total of 8 times. (24)
Check your gauge here. Your circle should be approximately 3.5” (9 cm) in diameter. If it is bigger than that, try using a 6 or 7 mm hook (or crochet tighter). If it is smaller than that, try using a 9 or 10 mm hook (or crochet looser).
Round 4: hdc in the next st, *2 hdc in the next st, hdc in the next 2 sts* repeat the starred section for a total of 7 times, 2 hdc in the next st, hdc in the last st (32)
Round 5: *2 hdc in the next st, hdc in the next 3 sts* repeat the starred section for a total of 8 times. (40)
Round 6: hdc in the 3rd loop of each st around. (40)
Rounds 7-11: hdc in each st around. (40)
Round 12: *hdc in the 3rd loop of the next st, 2 hdc in the 3rd loop of the next st* repeat the starred section for a total of 20 times. (60)
Rounds 13-14: hdc in each st around (60)
Sc in the next st, sl st in the next st, fasten off and weave in ends.
Adult Size
Start with a magic circle
Round 1: Ch 1, hdc 8 in the circle. Pull on your starting tail to close the magic circle. (8)
Round 2: 2 hdc in each st around. (16)
Round 3: *2 hdc in the next st, hdc in the next st* repeat the starred section for a total of 8 times. (24)
Check your gauge here. Your circle should be approximately 3.5” (9 cm) in diameter. If it is bigger than that, try using a 6 or 7 mm hook (or crochet tighter). If it is smaller than that, try using a 9 or 10 mm hook (or crochet looser).
Round 4: hdc in the next st, *2 hdc in the next st, hdc in the next 2 sts* repeat the starred section for a total of 7 times, 2 hdc in the next st, hdc in the last st (32)
Round 5: *2 hdc in the next st, hdc in the next 3 sts* repeat the starred section for a total of 8 times. (40)
Round 6: hdc in the next 2 sts, *2 hdc in the next st, hdc in the next 4 sts* repeat the starred section for a total of 7 times, 2 hdc in the next st, hdc in the last 2 sts. (48)
Round 7: hdc in the 3rd loop of each st around. (48)
Rounds 8-12: hdc in each st around. (48)
Round 13: *hdc in the 3rd loop of the next st, 2 hdc in the 3rd loop of the next st* repeat the starred section for a total of 24 times. (72)
Rounds 14-15: hdc in each st around. (72)
Sc in the next st, sl st in the next st, fasten off and weave in ends.
Pom Poms
Turn the hat inside out and sew a button between rounds 4 and 5. Sew another button directly opposite the first button between rounds 4 and 5.
Turn the hat right side out. Pull the loop of a pom pom through to the inside of the hat where a button is. Hook the loop around the button to secure the pom pom. Repeat with the other pom pom.
Tips for Working with Chenille Yarn
Working with chenille yarn can feel a little different if you’re used to standard acrylic or cotton, but once you get the hang of it, it’s actually really enjoyable. Because the fibers are so soft and plush, it can be harder to clearly see your stitches, so it helps to slow down and check your work as you go. Using a stitch marker is especially helpful for keeping track of your rounds, since it’s easy to lose your place. You’ll also want to avoid pulling your stitches too tight, as chenille yarn needs a bit of room to keep its soft texture and prevent breakage. If something doesn’t look quite right, don’t be afraid to pause and count your stitches—catching mistakes early will save you a lot of frustration later.
Frequently Asked Questions
Can you crochet a bucket hat with chenille yarn?
Yes, chenille yarn works great for bucket hats. It creates a soft, plush texture and works up quickly.
Is this crochet bucket hat beginner friendly?
Yes. This pattern uses basic stitches and simple construction, making it ideal for beginners.
What is the best yarn for a crochet bucket hat?
Chenille yarn is great for softness, while cotton yarn is better if you want more structure.
Love this pattern? You might like these other crochet patterns:
© 2025 Littlejohn’s Yarn. All rights reserved.
Originally designed by Nine Inspired, this pattern has found a new home with Littlejohn’s Yarn and is shared here with permission.