

Have you heard the good news? Fanny packs are back in style! These fun and functional little bags are quick and easy to make. Using rainbow colors and classic granny stitch adds even more fun to the mix and gives you the opportunity to show off your pride style!
- Get the ad-free, large print, printable PDF pattern HERE. Scroll down for the free version.
- Add this pattern to your Ravelry queue HERE.
If you loved my Roxy Circle Bag then you are going to love this new Roxy Rainbow Bum Bag design!
FEATURES:
-zipper closure
-adjustable strap
-quick to make
Materials
- Worsted, Size 4, medium yarn in Red, Orange, Yellow, Green, and Blue (Sample is Caron Cakes in Rainbow Sprinkles)
- US G-6 / 4 mm crochet hook
- Stitch markers
- 8” Zipper
- Wide eye sewing needle
- 1” D Ring
- 1” Tri slide buckle
- 1” Lobster claw clasp
Skill Level
Intermediate
Yardage
300 yards (274 meters)
Finished Measurements
12” (30.5 cm) long by 6” (15.2 cm) tall with a 35” (88.9 cm) adjustable strap
Abbreviations
US terminology
- ch = chain
- st = stitch
- sl st = slip stitch
- sc = single crochet
- dc = double crochet
Gauge
The first two rounds of the bag should be approximately 2” (5 cm) across.
Notes
- Ch 3 counts as a dc.
- I will refer to double crochet stitches worked in the same space as a cluster.
- I used the pi method when planning out the increases in the circle. The stitch count is doubled every time the number of rounds doubles – on the 2nd, 4th and 8th rounds. Your work will likely curl quite a bit on the 3rd and 7th rounds. Keep going and it will straighten out!
Free Crochet Fanny Pack Pattern
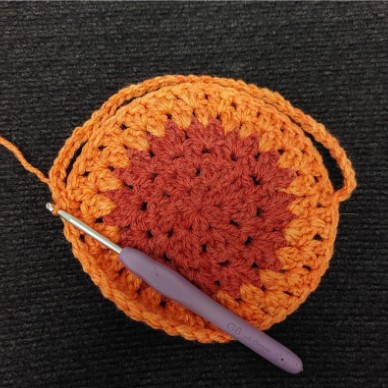
With red, magic circle
Round 1: Ch 3, dc 11 in the circle, sl st to the top of the ch 3 to join, drop yarn. Pull tight on your starting tail to close the circle. (12 sts)
Round 2: Ch 3, dc 3 in the same space, [skip the next 2 sts and dc 4 in the next space between sts] repeat 4 more times, sl st to the top of the ch 3 to join. (6 clusters)
Round 3: Ch 3, dc in the same space, [dc 2 in between the 2nd and 3rd sts of the next cluster, dc 2 in between the current cluster and the next] repeat 4 more times, dc 2 in between the 2nd and 3rd sts of the next cluster, sl st to the top of the ch 3 to join. (12 clusters)
Round 4: Ch 3, dc 3 in the same space, [dc 4 in the next space between clusters] repeat 10 more times, sl st to the top of the ch 3 to join, fasten off red. (12 clusters)
Round 5: Attach orange between any 2 clusters. Ch 3, dc in the same space, [dc 2 in between the 2nd and 3rd sts of the next cluster, dc 2 in between the current cluster and the next] repeat 10 more times, dc 2 in between the 2nd and 3rd sts of the next cluster, sl st to the top of the ch 3 to join. (24 Clusters)
Round 6: Ch 3, dc in the same space, [dc 2 in between the next 2 clusters] repeat 22 more times, sl st to the top of the ch 3 to join. (24 clusters)
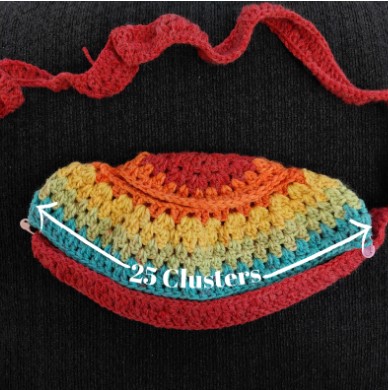
Round 7: Ch 36, skip 12 clusters and sl st between the 12th and 13th clusters.
Ch 3, dc in the same space, [dc 2 in between the next 2 clusters] repeat 11 more times, [sk 1 ch, dc in the next 2 chs] repeat 11 more times, sl st to the top of the ch 3 to join, fasten off orange. (25 clusters)
Round 8: Attach yellow between any 2 clusters. Ch 3, dc 3 in the same space, [dc 4 in the next space between clusters] repeat 23 more times, sl st to the top of the ch 3 to join. (25 clusters)
Round 9: Ch 3, dc in the same space, [dc 2 in between the 2nd and 3rd sts of the next cluster, dc 2 in between the current cluster and the next] repeat 22 more times, dc 2 in between the 2nd and 3rd sts of the next cluster, sl st to the top of the ch 3 to join, fasten off yellow. (50 clusters)
Round 10: Attach green between any 2 clusters. Ch 3, dc in the same space, [dc 2 in between the next 2 clusters] repeat 48 more times, sl st to the top of the ch 3 to join. (50 clusters)
Round 11: Ch 3, dc in the same space, [dc 2 in between the next 2 clusters] repeat 48 more times, sl st to the top of the ch 3 to join, fasten off green. (50 clusters)
Rounds 12-13: Repeat rounds 10-11 with blue.
Strap
Ch 202
Row 1: Dc in the 4th ch from the hook, dc in the next 56 chs, [sk 1, dc 2 in the next ch] repeat across, dc 2 more in the last ch, rotate your work so you can crochet on the opposite side of the ch, sk 2, dc 2 in the next ch, [sk 1, dc 2 in the next ch] repeat across to the last 58 sts, leave remaining sts unworked, fasten off and weave in ends.
Assembly
Lay your bag flat as shown, positioning the rounded end of the strap (where the 4 dc sts are all together in one stitch) on one end of the opening of the bag, using a stitch marker to hold it in place.
Count 25 clusters across on the last row of the bag and match it up with 25 clusters along the strap, use another stitch marker to hold it in place.
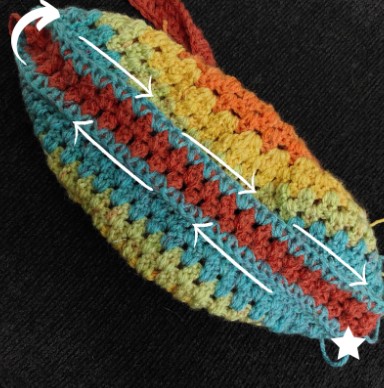
Turn the bag inside out. Attach your blue yarn at the spot indicated by a star in the photo. Notice the direction of the work. We will start at the end opposite from the rounded end, crochet along one side, around the rounded end, and then back along the opposite side.
You will go through both one stitch on the blue round and the space between clusters on the strap and do a single crochet. Then go through the next stitch on the blue round (the second stitch of the cluster) and in the same space between clusters on the strap and do another single crochet.
Continue connecting blue stitches to red spaces in this fashion until you get to the rounded end. Hold the D Ring in between the 2 layers as shown while you connect two blue stitches in between the 2nd and 3rd sts of the 4 dc cluster.
Continue connecting blue stitches to red spaces until you have completed attaching the opposite side. Fasten off, and turn the bag right side out.
Finishing Touches
You may need to sew a few supporting stitches around the D Ring to hold it in place.
Add a knot in the strap where it connects to the side of the bag. (optional)
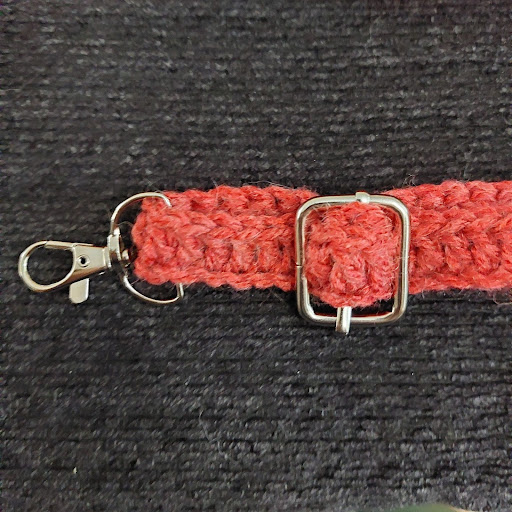
Attach the hardware to the strap as follows:
Thread the free side of the strap through the tri slide buckle. Then, put the strap through the lobster claw clasp.
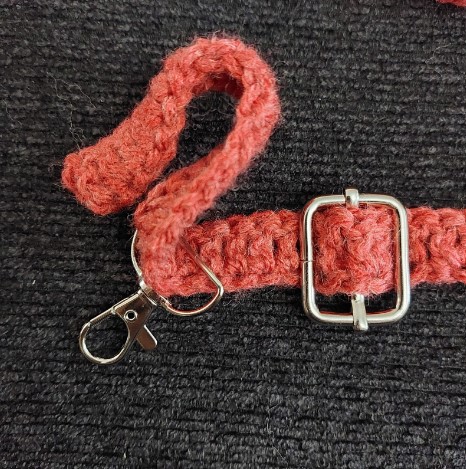
Finally, thread the strap back through the tri slide buckle.
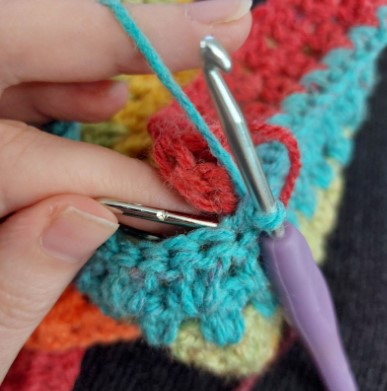
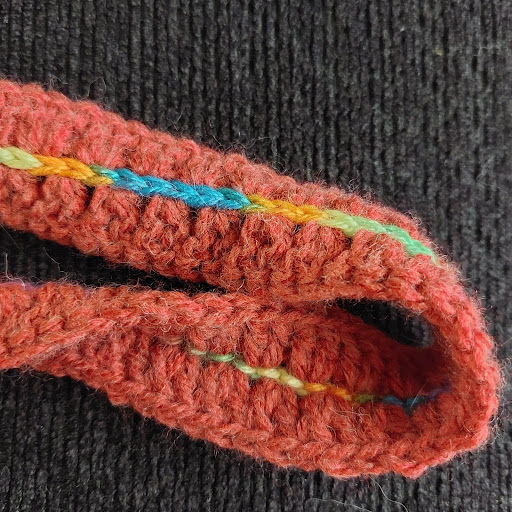
To reinforce the strap, crochet down the middle using surface slip stitches. You can use an accent color or make it red to match.
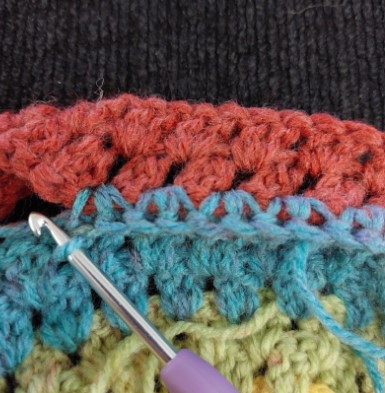
Sew the zipper into the opening of the bag using a wide eye sewing needle and orange yarn. I used the back stitch for my bag.

Starting from inside the zipper, You will go out through the second stitch, then go back in through the first stitch.
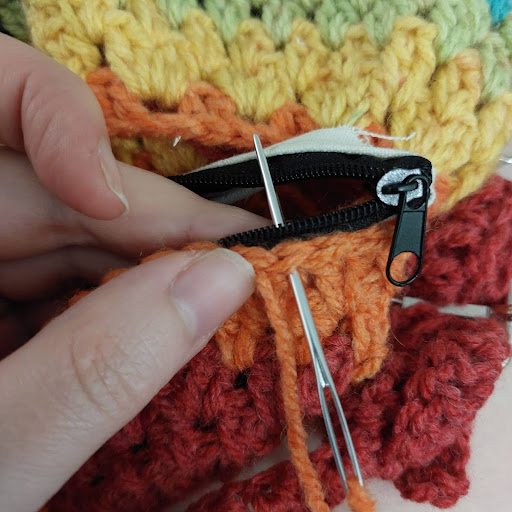
Then go out through the 3rd stitch and back in through the 2nd stitch. Continue in this fashion all the way around. Weave in all your ends and your super cute new bag is ready to rock!
____________________
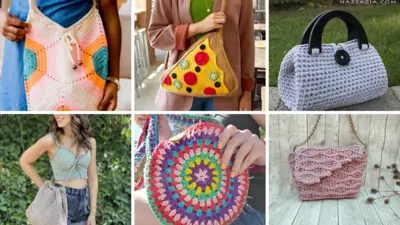
Did you enjoy this free crochet fanny pack pattern? You might like these other free crochet bag patterns!
© 2025 Littlejohn’s Yarn. All rights reserved.
Originally designed by Nine Inspired, this pattern has found a new home with Littlejohn’s Yarn and is shared here with permission.