
If you are tired of crocheting the same old rectangles and square projects, then it’s time to start thinking outside the box (pun intended). The use of increases will change the way you look at crochet and open the doors to new and interesting patterns
As a crocheter who often ventures into the online crochet communities where people post their latest crochet creations. Every so often, a picture will be captioned “sorry, not pattern, freehand”.
As a crochet designer, I know very few things are actually freehand. Most patterns have the same base construction. Last week we discussed creating a pattern with simple panels. You can check out that article HERE
I know many of you don’t want to hear this, but crochet is just a bunch of math covered in pretty yarn. To achieve a certain shape, the pattern has to be mathematically correct. No need to stress, if you can count to 5, then you will have no problem grasping the basic concept of using increases.
Increasing
The simple act of adding multiple stitches in one stitch can change the entire shape of your project. Whether you are putting a border on your blanket, creating a ruffle, crocheting a spiral, or making a simple flat circle, increasing plays a heavy role in pattern design. Stitch increases are the building blocks to creating your own patterns. The pattern possibilities are endless just by adding an extra stitch. In this article, I’m going to teach how to use increases to shape your project
Understanding the basics
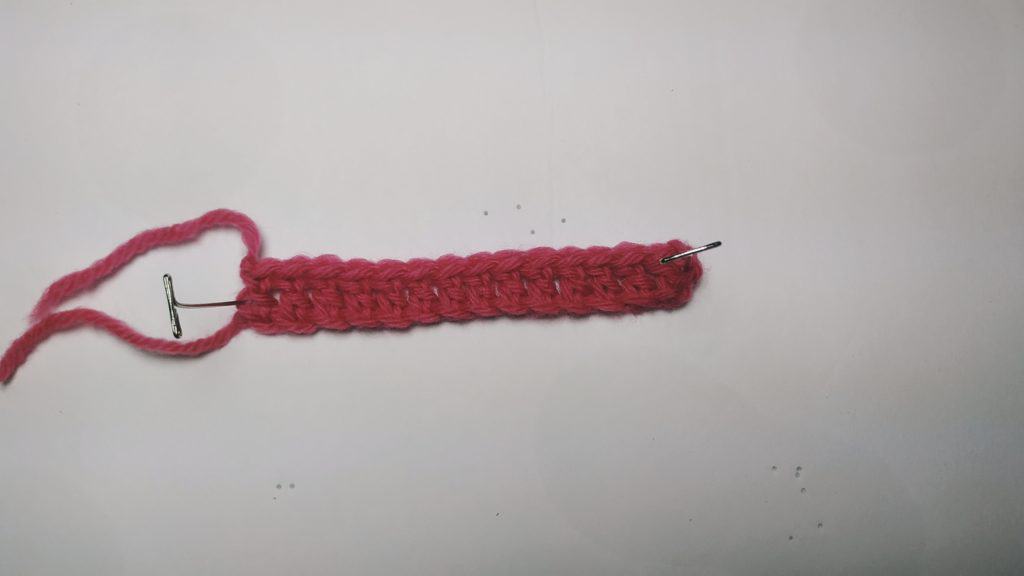
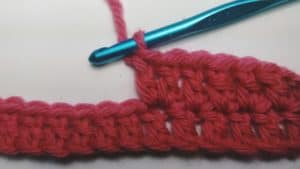
To understand increases, we’re going to look back at what you already know. Placing a single stitch in a single stitch. When done properly, you should have a nice straight piece. This works great with blankets, scarves, or any square/rectangular project. Below is a piece done with Double Crochet in each stitch across.
What is an increase stitch? | How to increase a crochet pattern
An increase is done when 2 or more stitches are crochet in a stitch. Single crochet, half double crochet, double crochet, and longer stitches are all increased in the same manner.
There is no specific abbreviation for a crochet increase. Patterns will usually give instructions similar to “2 sc in the next sc”, to indicate you will work two single crochet stitches in the next single crochet stitch, and thereby increase.
What does an increase stitch do?
An increase will allow you to widen your work, add shape, or help create an intricate design. Don’t worry, I said this is for the beginner designer. We’re just going to focus on widening and adding shape. Learning more intricate designs will come with practice and time.
When would I increase in a pattern?
You can increase at the end of your row to widen your pattern.
This diagram shows how to increase the crochet stitch at the end of the row. (not an accurate pattern)
Row 1: 4 Dc in each row across
Row 2: 2Dc in the same stitch, dc in the next 3 sts, 2dc.
Row 3: 2Dc in the same stitch, dc in the next 5sts, 2dc.
Row 4: 2Dc in the same stitch, dc in the next 7 sts, 2dc
Below is the crochet increase chart for this stitch pattern.
As you can see, there is a pattern being created. Crochet increases are not placed randomly. Notice how the italicized numbers increase by two stitches each row. That is because you are adding 2 double crochets, 1 stitch to the beginning & 1 stitch at the end of the row.
Want to see how you can take this simple tip and put in into a design?
Check out this pattern based on simple increases at the end of the row.

Corners
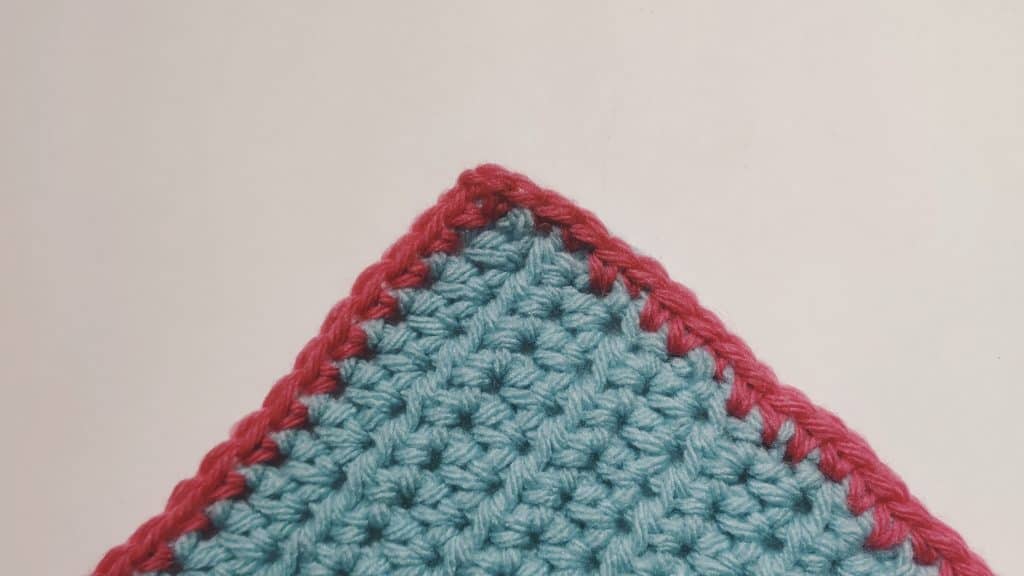
When you finish your project, you want to add a border to make your item pop. I’m going to teach you how to create square corners that lay flat and do not bunch up with increases.
I prefer to use a single crochet border as a base when adding edging to any of my projects. It offers a neater edge & a great base for a more intricate border
Example pattern
Attach to any stitch
Round 1:Ch 1,* sc in each st around until corner, (sc, ch 2, sc) in corner*, Repeat *to* around, slp st to join.
Round 2: Ch 1,*sc in each st around until corner, (sc, ch 2, sc) in ch-2 sp*, Repeat *to* around, slp st to join.
Creating a crochet spiral
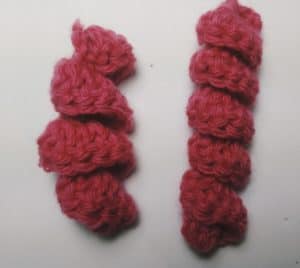
Remember how we discussed how increases can shape your project. Adding increases throughout your row will create a curve to your project. To create a spiral, you’ll be placing multiple stitches in each stitch across. The number of stitches you choose to put in each stitch will cause the spiral tightness to be loose or tight. When creating a spiral, I typically use 3-5 stitches in one stitch
Below I have an example of a pattern that calls for 2 DC in each stitch and another with 4 DC in each stitch. Notice the tightness of the spiral.
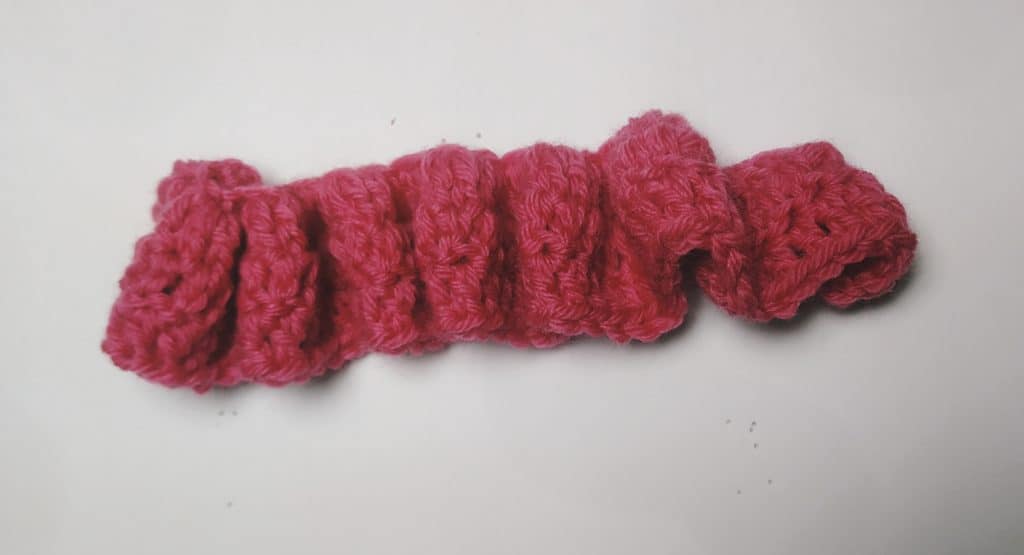
Using increased stitches to make ruffles
Ruffle edging is a great way to add a fancy touch to the end of your crochet project. If the Spiral had a sister, it would be the ruffle. To begin your crochet ruffle, you will start in the same way as the spiral by adding multiple stitches to each stitch. With a ruffle, you will go on to complete row 2 and beyond with even stitches in each row (no increases). The base increases with what will create the ruffle.
You can make a ruffle as flat or as full as you want, by adding more or fewer stitches. You can work almost any stitch combination as a ruffle. I usually use 3-5 stitches per stitch
Example Pattern
Row 1: 3 Dc in each st across, turn.
Row 2: Ch 1, dc in each st across.
Crochet increase in the round
Want to learn how to create a hat or a basket? Properly increasing while working in the round can expand your pattern-making options.
If you use the one stitch in one stitch while working in the round, you will make a tube that is exactly the circumference of your original row.
Adding increases throughout your row will cause your row to bend in the round also. This is important when shaping items for your head. But before we talk about creating a hat, you will need to learn how to crochet the perfect circle.
The math is very similar to widening of the pattern above
Ring
Round 1: 10Dc into ring, sl st to join.
Round 2: Ch 1, 2Dc in each dc around, sl st to join
Round 3: Ch 1, (2Dc, dc in the next st) rep around, sl st to join.
Round 4: Ch 1, (2Dc, dc in the next 2 sts) rep around, sl st to join
Round 5: Ch 1, (2Dc, dc in the next 3 sts) rep around, slp st, to join
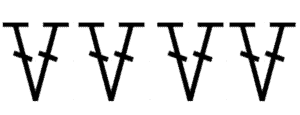
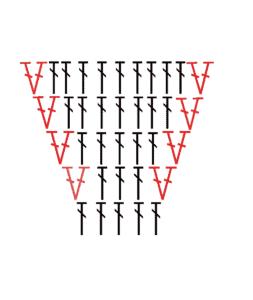
Once again notice the italicized numbers of each row increase by one double crochet in between your increases. Look at the picture below, the “V” represents the increases in each row. Can you see the pattern?

Conclusion
Once you learn the building blocks of creating a pattern, you will open the doors to more creative design. If you are enjoying my designer series, then check out how to create crochet clothes using simple panels. This will be great for those who enjoy making square or rectangular projects. Check it out HERE