
The crochet granny triangle is a delightful twist on the classic granny square, offering a versatile shape that opens up a world of creative possibilities. With its intricate clusters and airy design, this triangular beauty has become a favorite among crafters looking to add a unique touch to their projects. Whether you’re drawn to its vintage appeal or its modern adaptability, the granny triangle is a must-try for anyone who loves the art of crochet.
Crochet Triangle Video tutorial
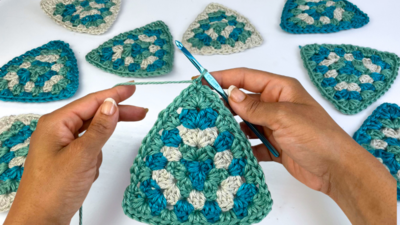
I’ve created an engaging video tutorial to guide you through every step of the process. Perfect for visual learners, this tutorial walks you through the creation of your triangle, ensuring you never miss a stitch. To make it even easier, timestamps are included at the end of each round
Why Crafters Love the Granny Triangle
One of the standout features of the granny triangle is its flexibility. This shape works wonderfully as a standalone piece or as part of a larger design. Imagine transforming it into a cozy shawl, a festive garland, or even a patchwork blanket.
The combination of bold colors and repeating patterns allows you to showcase your personal style, making each project a reflection of your creativity. Its classic granny stitch—known for its textured, nostalgic look—brings a timeless quality that appeals to both beginners and seasoned crocheters.
Creative Uses for Your Granny Triangles
The possibilities are endless with this versatile shape. Use it to craft a lightweight shawl perfect for cool evenings, or string several together for a charming bunting to decorate your home. For a fun twist, combine multiple triangles into a vibrant wall hanging or a unique cushion cover.
The granny triangle’s adaptability also makes it ideal for gifts—think personalized coasters or a stylish scarf for a loved one. With a little imagination, you can turn these triangles into anything from practical items to eye-catching decor.
Ready to dive into your next project? The crochet granny triangle is waiting to spark your creativity!
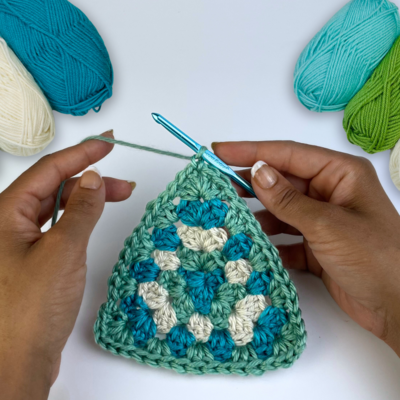
Materials
Any weight yarn (5 colors) & recommended hook size
Abbreviations (US Crochet Terms)
Ch- Chain
St(s)- Stitch(es)
Sl st- Slip Stitch
Dc- Double Crochet
Rep- Repeat
Sp- Space
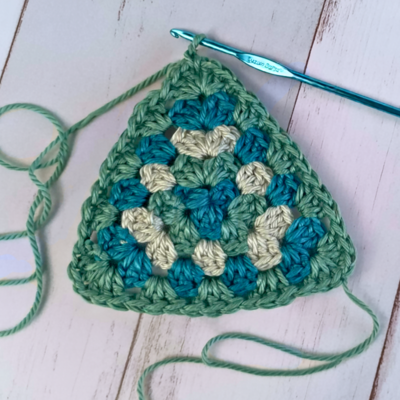
Pattern
Make a magic ring (or ch 4 and join with a sl st to form a ring).
Round 1: Ch 3 (counts as dc), 2 dc in ring, ch 1, (3 dc, ch 1) 2 times in ring, sl st to top of ch-3 to join, fasten off. (3 dc clusters, 3 ch-1 sps)(video 0:37)
Attach next color of yarn to any ch-1 sp.
Round 2: Ch 3, (2 dc, ch 1, 3 dc) in same ch-1 sp, *(3 dc, ch 1, 3 dc) next ch-1 sp, repeat from * 1 more time, sl st to top of ch-3 to join, fasten off. (6 dc clusters, 3 ch-1 sps)(video 2:34)
Attach next color of yarn to any ch-1 sp.
Round 3: Ch 3, (2 dc, ch 1, 3 dc) in same ch-1 sp, 3 dc in sp between next 3-dc clusters, *(3 dc, ch 1, 3 dc) in next ch-1 sp, 3 dc in sp between next 3-dc clusters, rep from * 1 more time, sl st to top of ch-3 to join, fasten off. (9 dc clusters, 3 ch-1 sps)(video 5:53)
Attach next color of yarn to any ch-1 sp.
Round 4: Ch 3, (2 dc, ch 1, 3 dc) in same ch-1 sp, 3 dc in each sp between 3-dc clusters until next ch-1 sp, *(3 dc, ch 1, 3 dc) in next ch-1 sp, 3 dc in each sp between 3-dc clusters until next ch-1 sp, rep from * 1 more time, sl st to top of ch-3 to join, fasten off. (12 dc clusters, 3 ch-1 sps)(video 10:08)
Additional Rounds: Repeat Round 4, working (3 dc, ch 1, 3 dc) in each ch-1 corner sp and 3 dc in each sp between 3-dc clusters along sides. Each round adds one 3-dc cluster on each side of the triangle, for a total of 3 additional 3-dc clusters for the stitch count.
Finishing: Fasten off after desired number of rounds. Weave in ends. Block if needed.
Tips for Perfecting Your Granny Triangle
To get the best results, consider experimenting with color changes to highlight the triangle’s structure. Switching yarns every few rounds can create a striking ombre effect or a playful pattern. Blocking your finished triangles is another great tip—lightly steaming or pinning them can enhance their shape and give your project a polished look. Pairing the right hook size with your yarn choice also ensures a balanced texture, making your work stand out.